If you are launching a WooCommerce store and want snappy page loads without paying a ridiculous premium, dropping it on a Vultr instance managed by CloudPanel is one of the cleanest setups you can get. CloudPanel gives you a lightweight, zero-bloat dashboard for managing your site, completely bypassing the resource-heavy overhead of traditional web hosting panels.
Spin Up the Vultr Instance
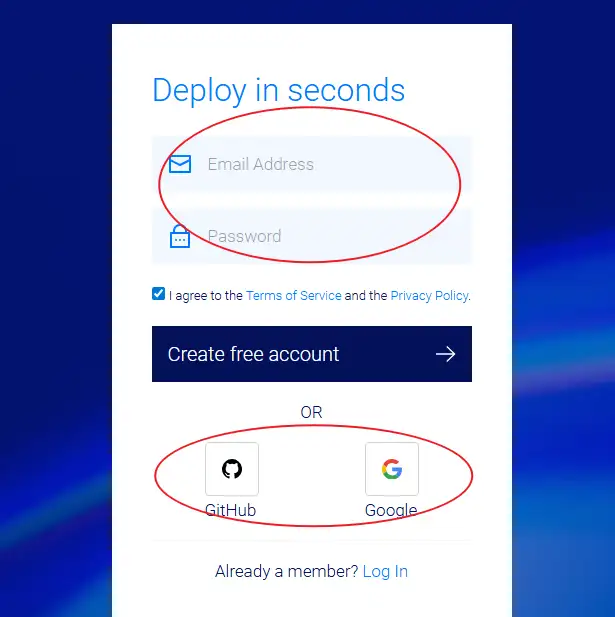
Head over to Vultr. Drop in your email, set a strong password, and hit Create free account. Alternatively, just link your Google or GitHub account to bypass the form filling.
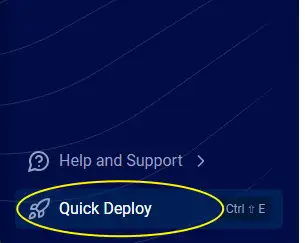
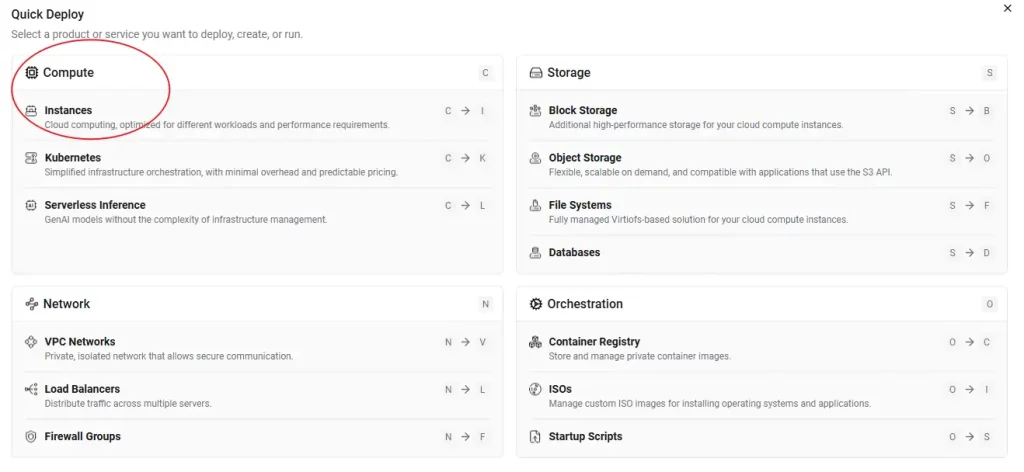
Once you are inside the Vultr control panel, click Quick Deploy in the bottom left corner, or just navigate straight to Instances.
Location and Compute Selection
First rule of infrastructure deployment: pick a server location closest to your actual paying customers. If your audience is in North America, pick a US data center.
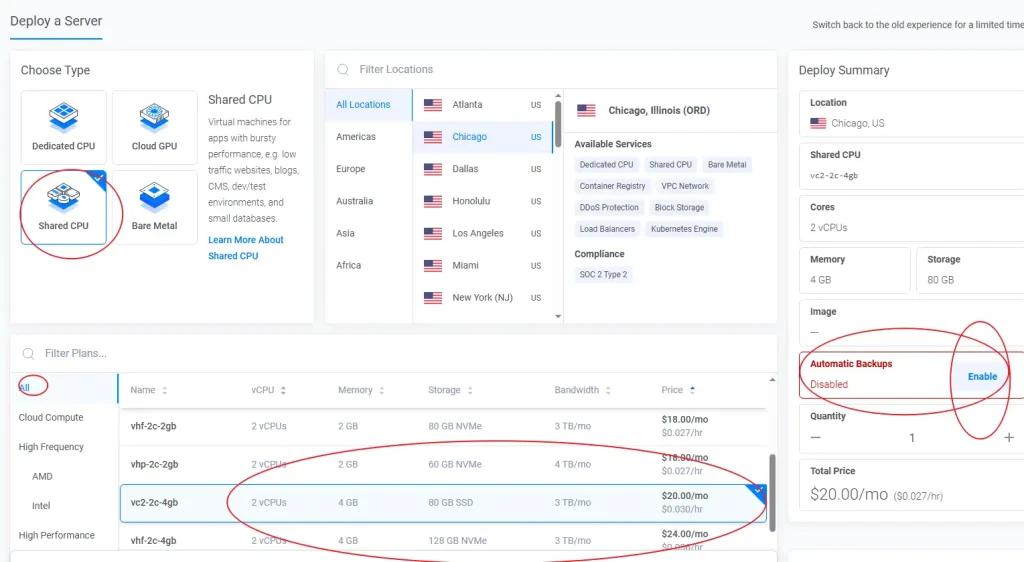
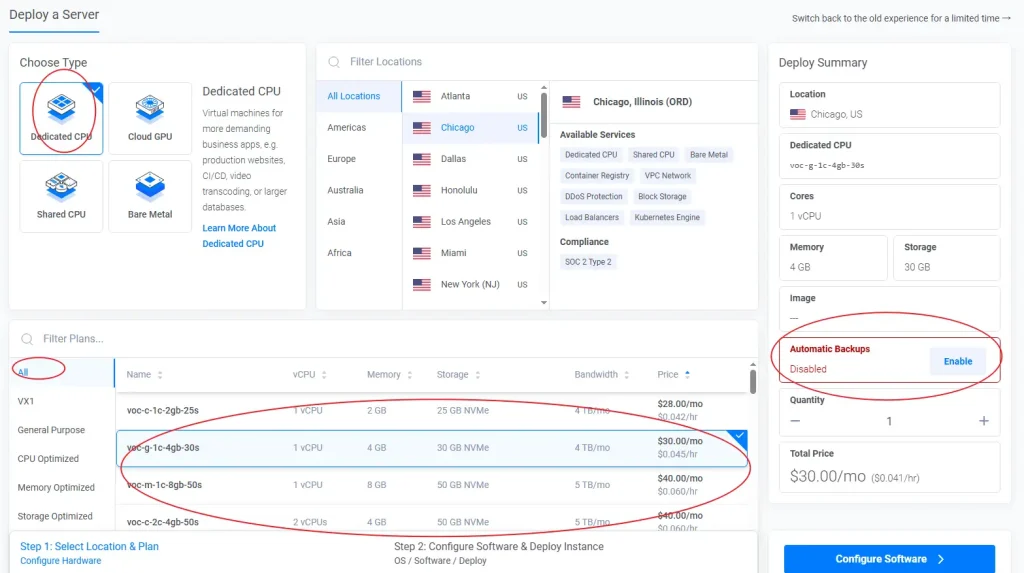
Next, choose your compute type. You will see options for Dedicated CPU and Shared CPU.
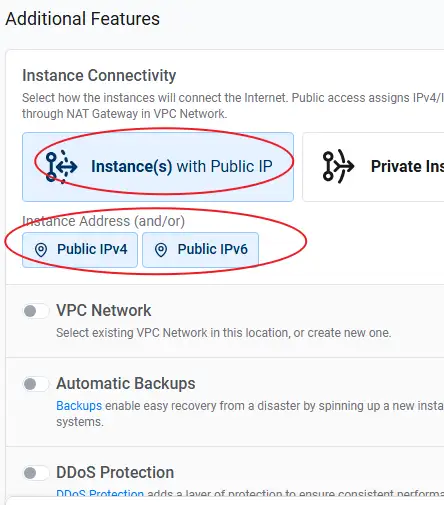
Make sure to disable Automatic Backups during configuration. Vultr charges extra for this by default. You can easily set up your own offsite backups later within CloudPanel for free.
For a fresh launch with zero baseline traffic, don’t waste money on a Dedicated CPU. Shared CPU instances have plenty of horsepower to get you off the ground, and you can easily scale up or migrate later with minimal friction.
When configuring a Shared CPU instance, aim for 2 vCPUs and 4 GB RAM. You will notice two options at this spec tier:
- The $20/mo option: Comes with 80 GB of standard SSD storage.
- The $24/mo option: Comes with 128 GB of NVMe storage.
Honestly, NVMe is objectively faster. For an extra $4 a month, it is worth the peace of mind. But if you are pinching pennies, standard SSDs work fine for WooCommerce; you won’t notice a life-changing difference in real-world page rendering anyway.
If you choose a Dedicated CPU plan, pricing jumps immediately to $40/mo for a 2 vCPU / 4 GB RAM setup. Stick to Shared CPU unless you are migrating an existing, high-traffic store from Shopify and already have a baseline of steady, concurrent checkout hits.
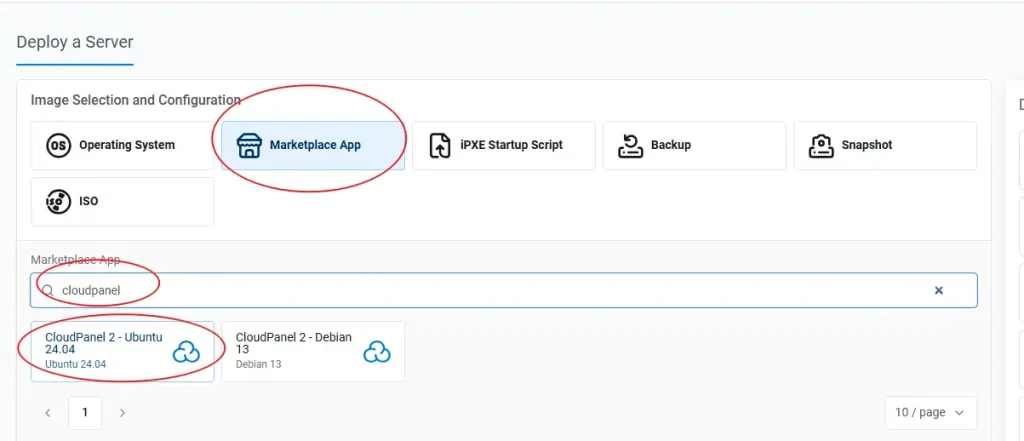
The 1-Click Marketplace Setup
The fastest way to deploy this stack is to click the Marketplace App tab, search for CloudPanel, and select CloudPanel 2 – Ubuntu 24.04. This automatically spins up a clean Ubuntu 24.04 LTS environment with the control panel pre-installed and configured.
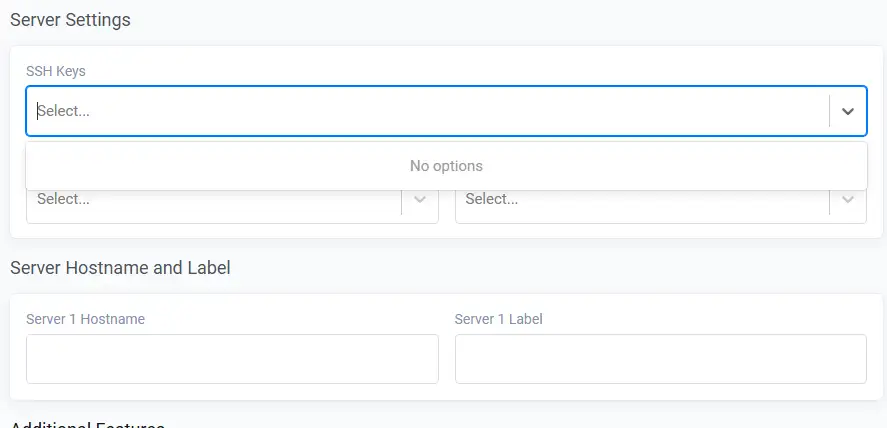
You cannot attach SSH keys during the initial marketplace deploy phase on Vultr, but you can assign them via the instance management panel right after creation.
Give the instance any hostname you like, make sure IPv4 is checked, and toggle IPv6 on since it is free. Hit deploy.
The Manual Installation Route (For Purists)
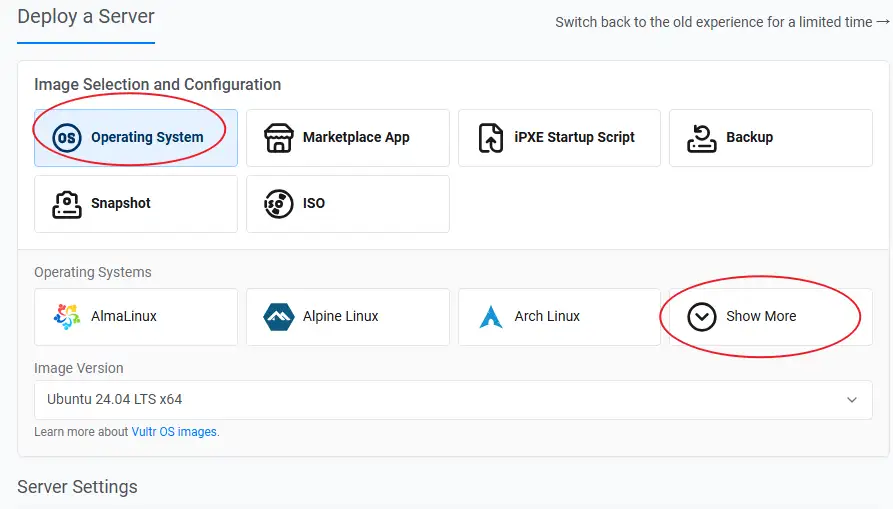
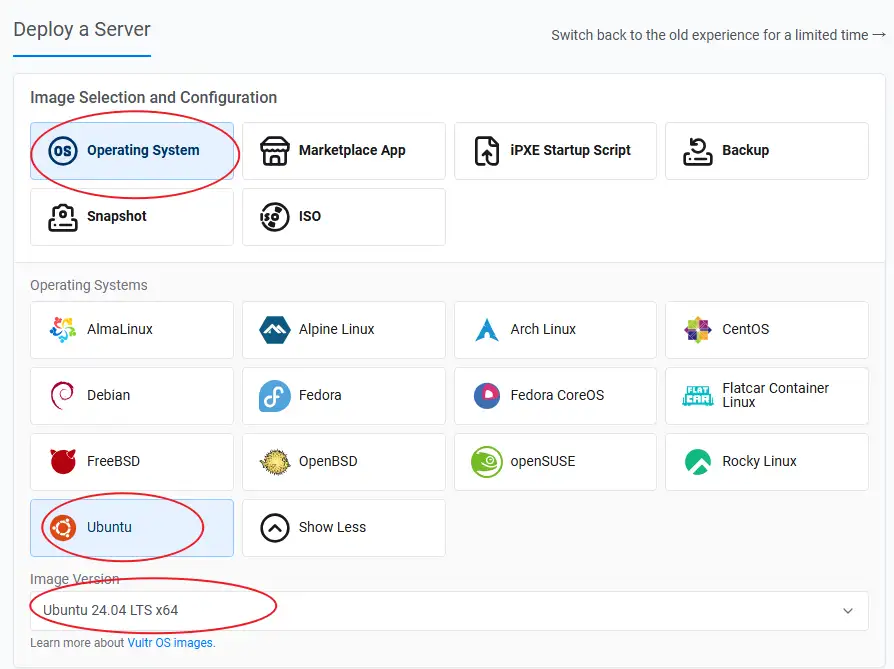
If you hate marketplace images and want a completely vanilla installation, select Operating System, click Show More, choose Ubuntu, and pick Ubuntu 24.04 LTS x64.
Once the server finishes provisioning, log in via your terminal using SSH.
If you are using a private key:
ssh -i path_to_your_private_key root@yourIpAddressIf you are using a password:
ssh root@yourIpAddressUpdate your package manager index and install the basic dependencies:
apt update && apt -y upgrade && apt -y install curl wget sudoNow run the CloudPanel installation script. You need to declare your preferred database engine. MySQL 8.4 or MariaDB 11.4 are both excellent, highly optimized choices for a modern WordPress/WooCommerce database stack. Take your pick.
MySQL 8.4
curl -sS https://installer.cloudpanel.io/ce/v2/install.sh -o install.sh && sudo DB_ENGINE=MYSQL_8.4 bash install.shMySQL 8.0
curl -sS https://installer.cloudpanel.io/ce/v2/install.sh -o install.sh && sudo DB_ENGINE=MYSQL_8.0 bash install.shMariaDB 11.4
curl -sS https://installer.cloudpanel.io/ce/v2/install.sh -o install.sh && sudo DB_ENGINE=MARIADB_11.4 bash install.shMariaDB 10.11
curl -sS https://installer.cloudpanel.io/ce/v2/install.sh -o install.sh && sudo DB_ENGINE=MARIADB_10.11 bash install.shSecure and Access Your Control Panel
Lock down your admin user profile immediately after deployment. Automated scripts and bots scan public cloud IP ranges constantly. If you leave the setup page sitting open, a bot will claim the admin account before you do. For real security, use Vultr’s firewall rules to restrict access to port 8443 so only your specific IP address can reach it.
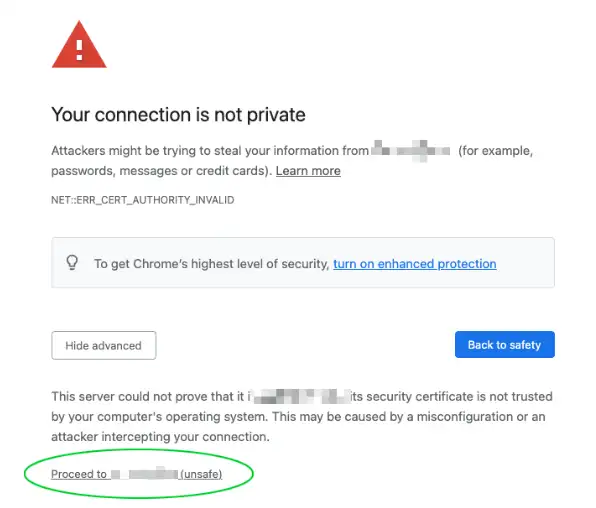
Open your browser and navigate to your instance: https://yourIpAddress:8443
Bypass the self-signed cert warning and finish the initial admin account creation setup inside CloudPanel.
With CloudPanel up and running, your environment is ready to handle WordPress and WooCommerce deployment smoothly. Check out our guide on managing your server and launching WordPress via CloudPanel to get your store live.