Don’t waste time changing your site title or drafting your first post right after spinning up a new WordPress instance. Your absolute first priority is fixing the permalink structure to enable pretty URLs.
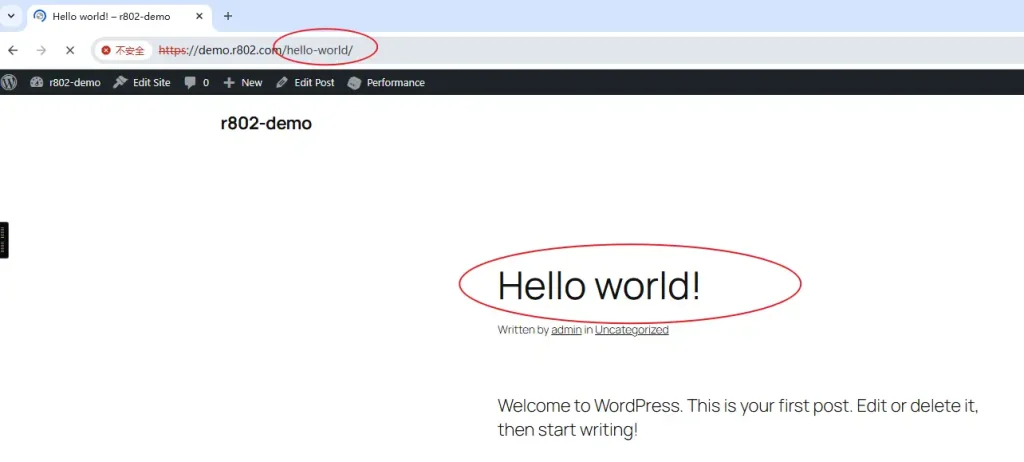
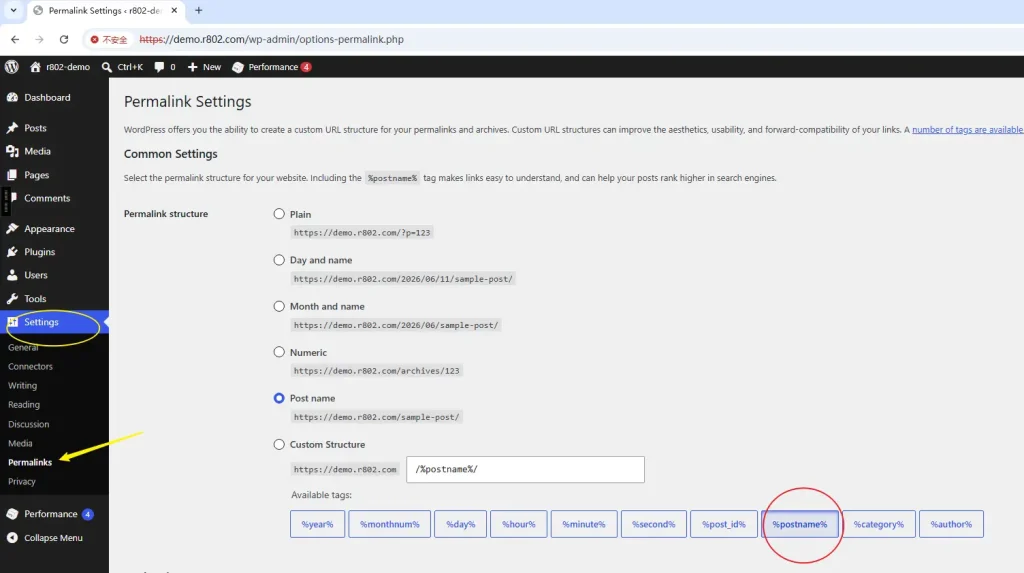
By default, WordPress uses an ugly, query-string format like https://demo.r802.com/?p=123. This looks terrible and active hurts your Google SEO rankings. You want clean, human-readable URLs like https://demo.r802.com/hello-world/.
The CloudPanel route (The easy way)
If you are running CloudPanel, you lucked out. The panel handles the heavy lifting out of the box because the default WordPress vhost template already includes the necessary rewrite rules. You can verify this by looking at the Vhost tab in your CloudPanel dashboard.
Since CloudPanel has Nginx pre-configured for you, skip the server config files entirely and go straight to the WordPress dashboard.
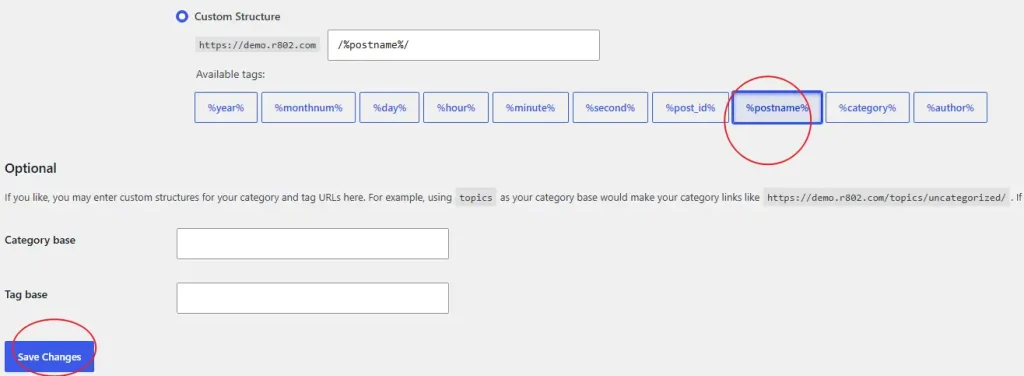
Navigate to yourdomain.com/wp-admin/options-permalink.php. Select the Post name option (which inputs /%postname%/), scroll down, and hit save. That’s it. Your pretty URLs are live.
Managing raw Nginx configs yourself
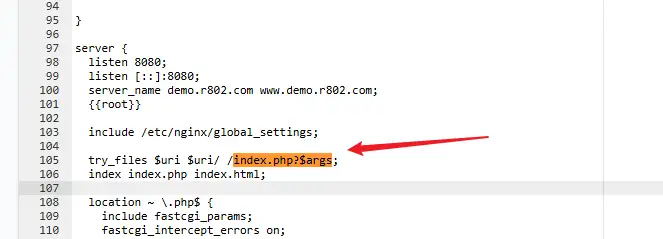
If you are not using CloudPanel and have to manage Nginx manually, WordPress will break with 404 errors on every subpage until you update the server block. Find your site’s Nginx configuration file—usually located in /etc/nginx/sites-available/ (often named example.com.conf) or inside the main nginx.conf—and drop the following rules inside the server block:
location /
{
     try_files $uri $uri/ /index.php?$args;
}

rewrite /wp-admin$ $scheme://$host$uri/ permanent;
Save the file and reload or restart Nginx to apply the changes. Once the web server knows how to handle the routing, jump back into the WordPress admin dashboard and follow the same permalink saving steps mentioned above to finalize the setup.