If you deployed a stock Ubuntu instance instead of using a pre-baked cloud marketplace image, you need to set up CloudPanel manually before staging your site. It is a quick cut-and-paste job that takes less than five minutes even on a cheap 2-core, 2 GB RAM slice.
The Raw Server Setup
Log into your box via SSH and update your system package repositories:
apt update && apt -y upgrade && apt -y install curl wget sudoNow kick off the bare-metal installer script. We are targeting Ubuntu 24.04 LTS and bundling MySQL 8.4 right out of the gate:
curl -sS https://installer.cloudpanel.io/ce/v2/install.sh -o install.sh && sudo DB_ENGINE=MYSQL_8.4 bash install.sh
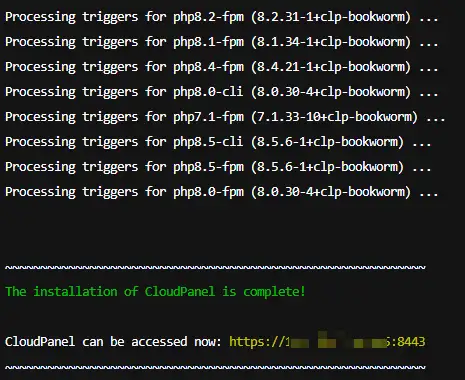
Once the terminal spits out the completion notice, your script execution is done.
Initializing CloudPanel Access
Bypass the self-signed cert warning in your browser and log into the web interface using your server’s IP address: https://yourIpAddress:8443. On the initial launch screen, define your primary administrator credentials.
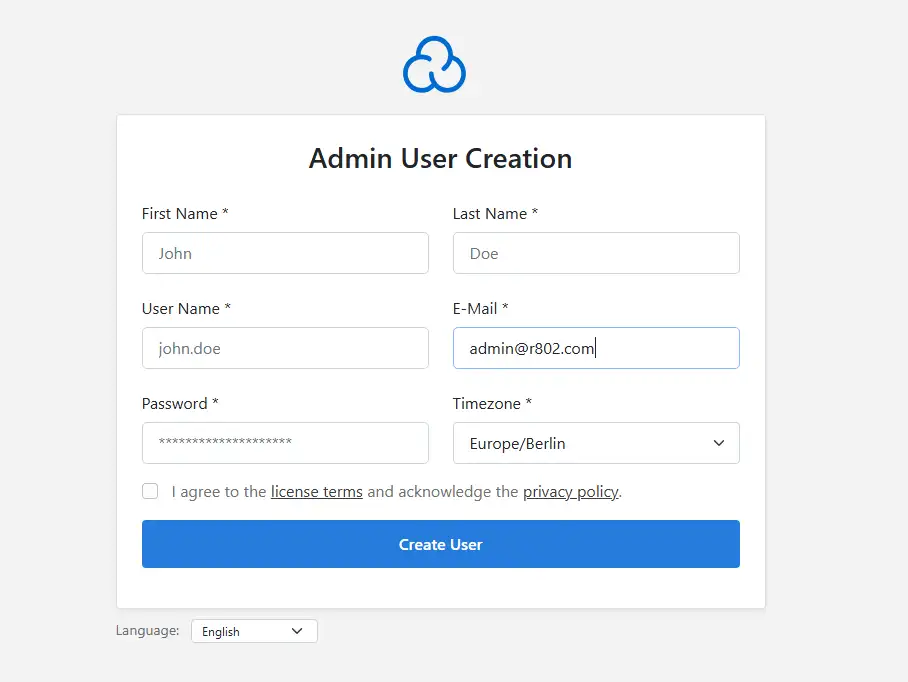
Don’t try logging in with the email address you just entered; the login portal strictly expects the alphanumeric username.
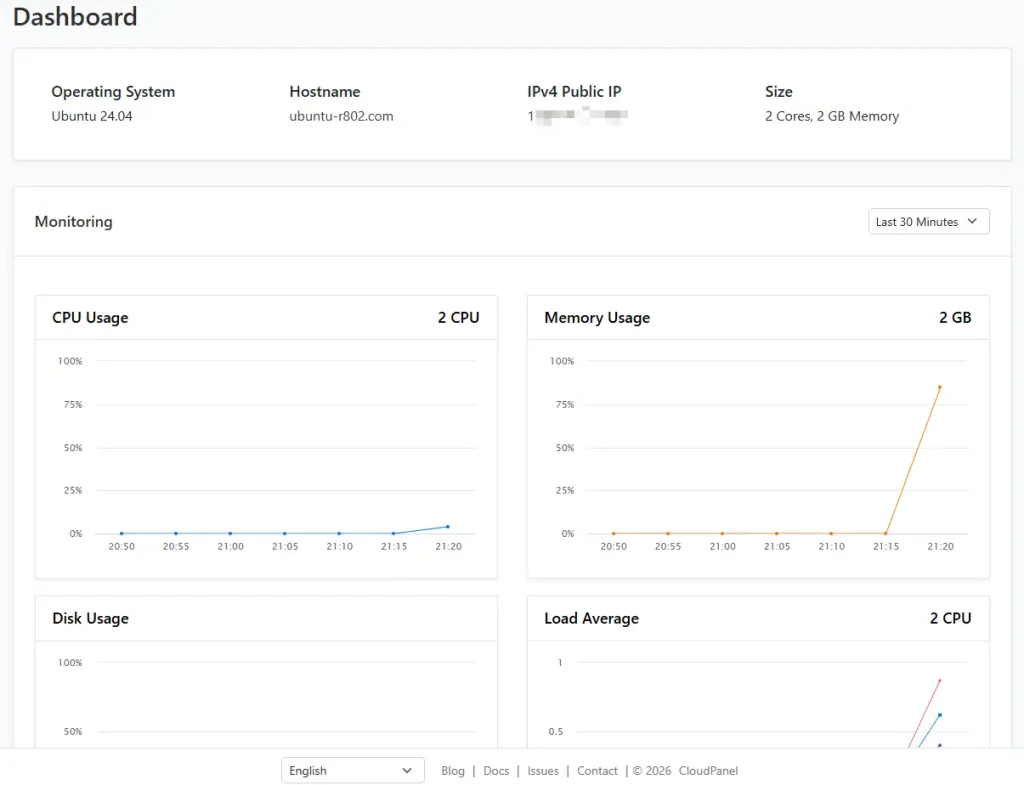
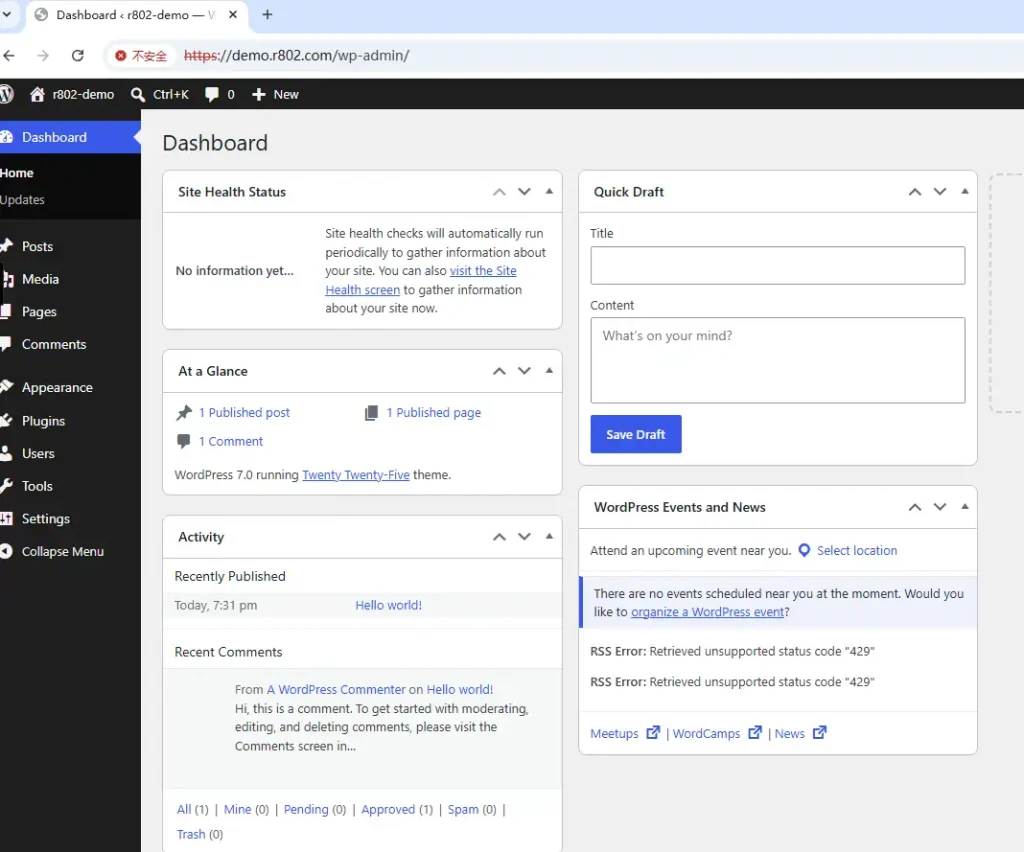
Once inside, you will land on the primary control dashboard.
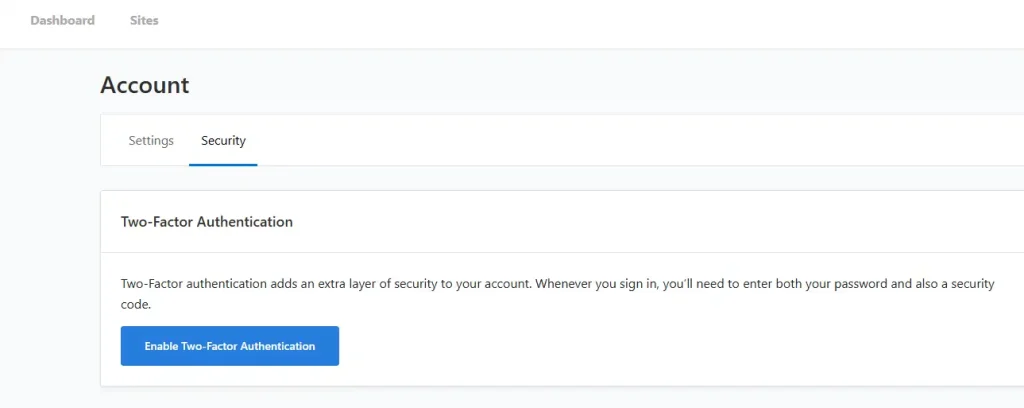
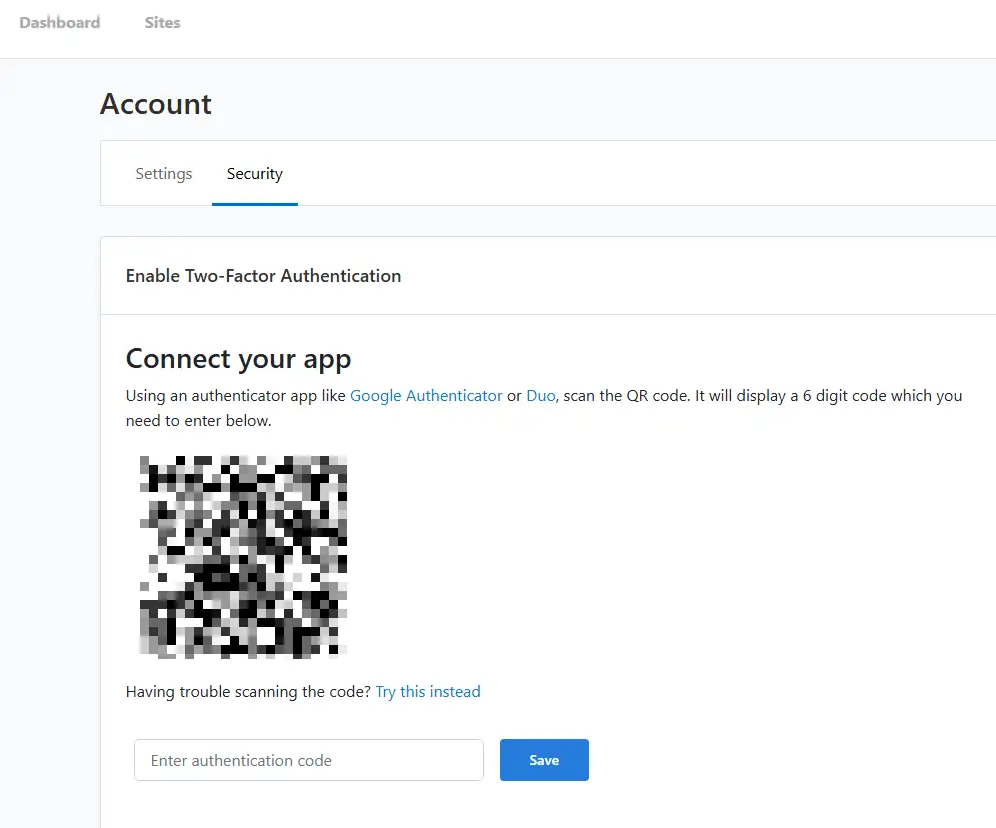
Do yourself a favor and activate Two-Factor Authentication (2FA) immediately under your account security settings. Leaving a hosting panel sitting on the public web with single-factor authentication is just asking for brute-force trouble.
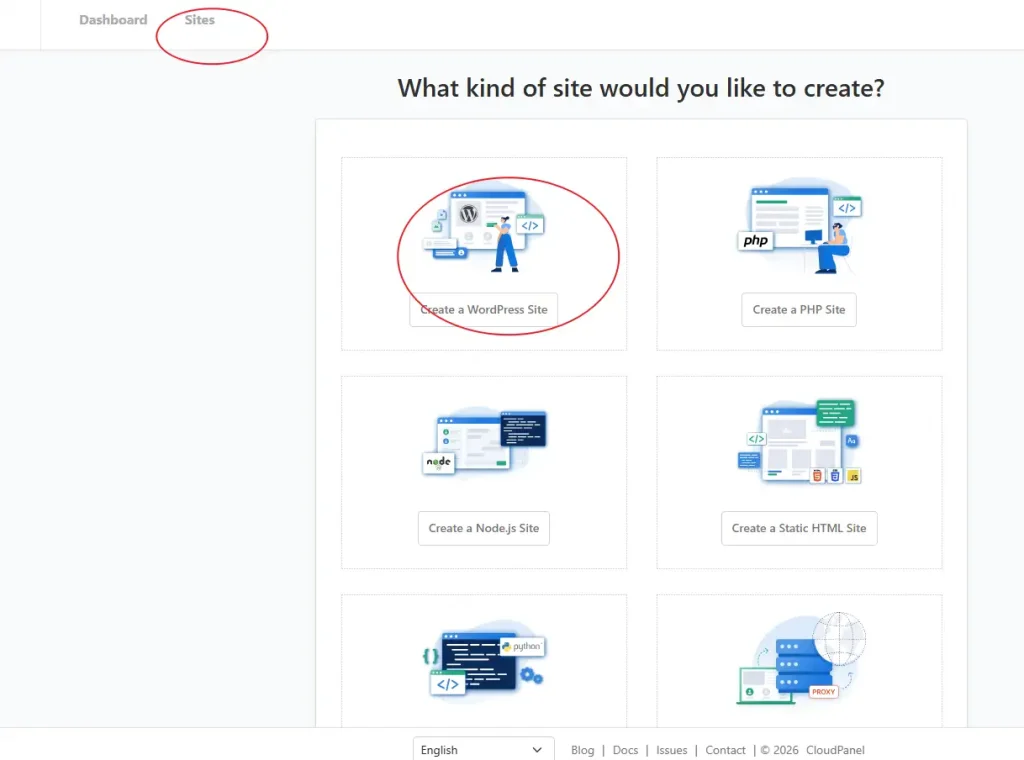
Spinning Up the WordPress Instance
Navigate over to Sites, click ADD SITE, and select Create a WordPress Site.

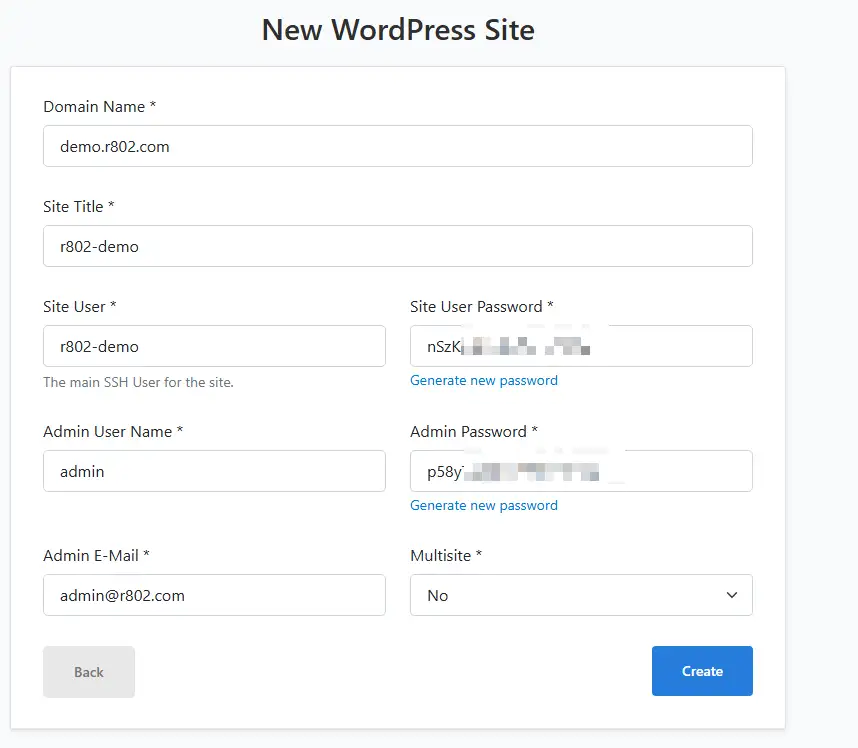
Pay close attention to how you fill out these fields:
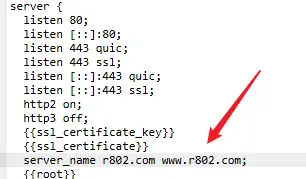
- Domain Name: Use the full www.yourdomain.com format. CloudPanel automatically handles the naked apex domain configuration and injects an Nginx rewrite rule to force redirect yourdomain.com over to www.yourdomain.com . This keeps your search engine indexing clean and concentrates your link equity. If the automatic alias mapping fails for some reason, jump into the site’s Vhost tab, look for the server_name directive, append your naked domain manually, and save the config.
- Site User vs. Admin User: The Site User is your isolated Linux system user account used strictly for SSH access and SFTP transfers. The Admin User is your actual native WordPress database administrator account used to sign into
yourdomain.com/wp-admin.
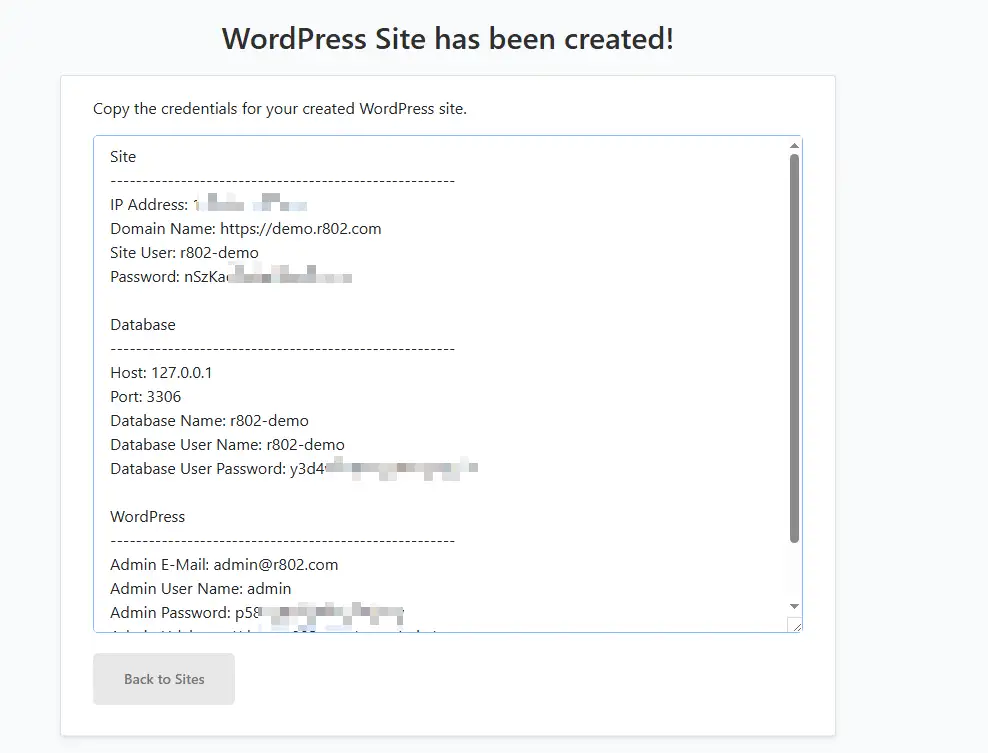
Hit create, and copy every single password block emitted on the confirmation screen. Store them directly inside a secure password manager—once you leave this view, CloudPanel will never display these plaintext database and system credentials to you again.
Now, jump over to your domain registrar or DNS zone manager and map an A record pointing your domain directly to the machine’s public IPv4 address. Honestly, ditch whatever third-rate DNS manager your registrar bundles by default. Route your domain nameservers through Cloudflare. Cloudflare’s free-tier DNS propagation takes minutes instead of hours, and their edge caching layer saves you massive bandwidth downstream.
Provisioning Let’s Encrypt SSL
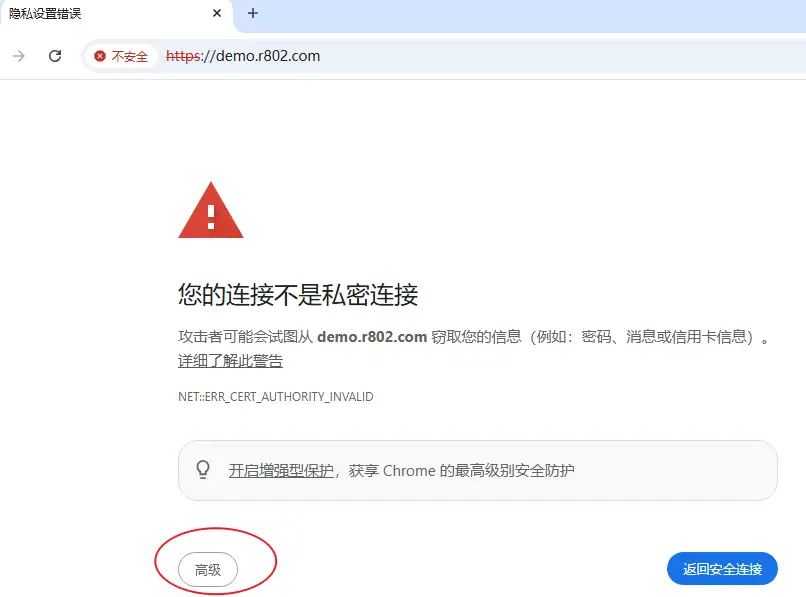
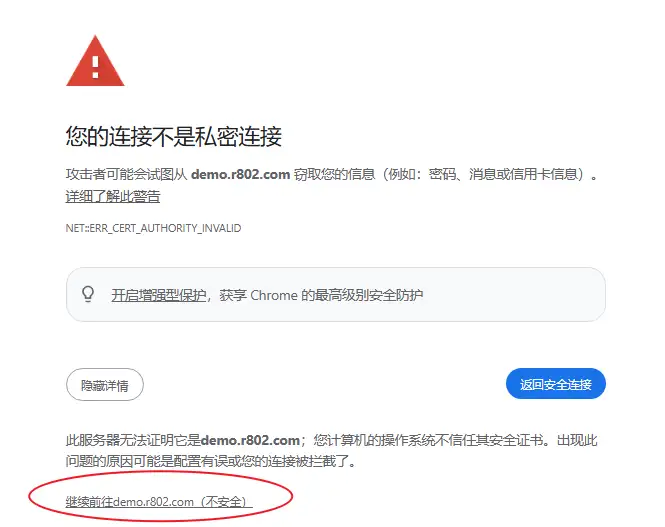
If you attempt to load the newly created domain right now, your browser will throw an SSL connection failure block. Click through advanced and proceed anyway to verify the site structure, but you cannot leave it like this for production traffic. While you can safely ignore the SSL warning on the CloudPanel port 8443 administration backend, your production domain must have a valid certificate, or payment gateways and search engines will block your storefront completely.
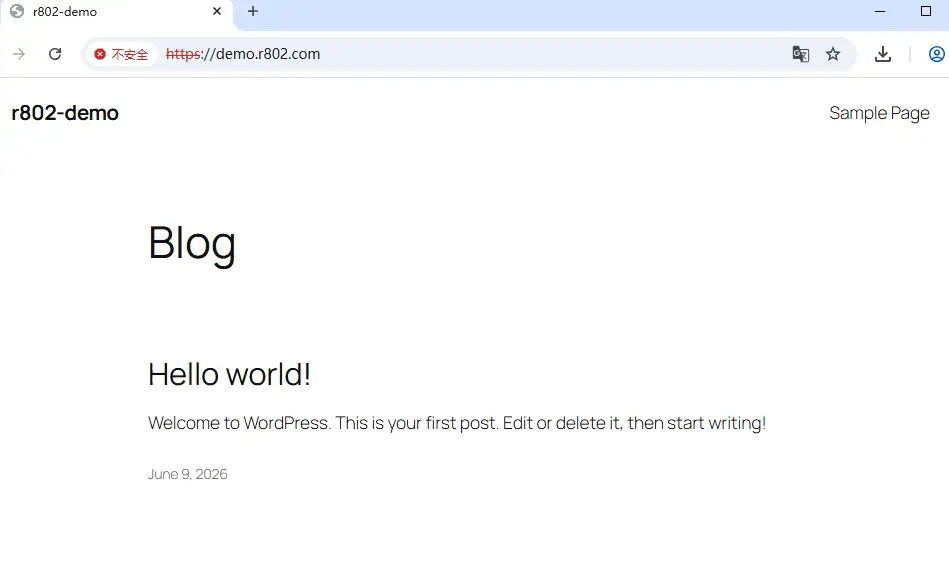
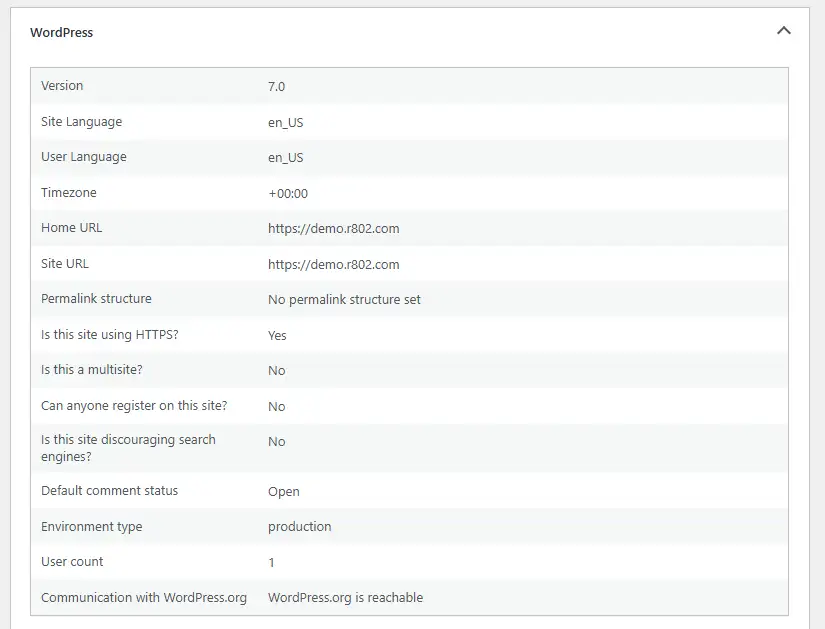
With your site successfully pulling up over standard HTTP, the default frontend and administrative dashboard are officially up and running:
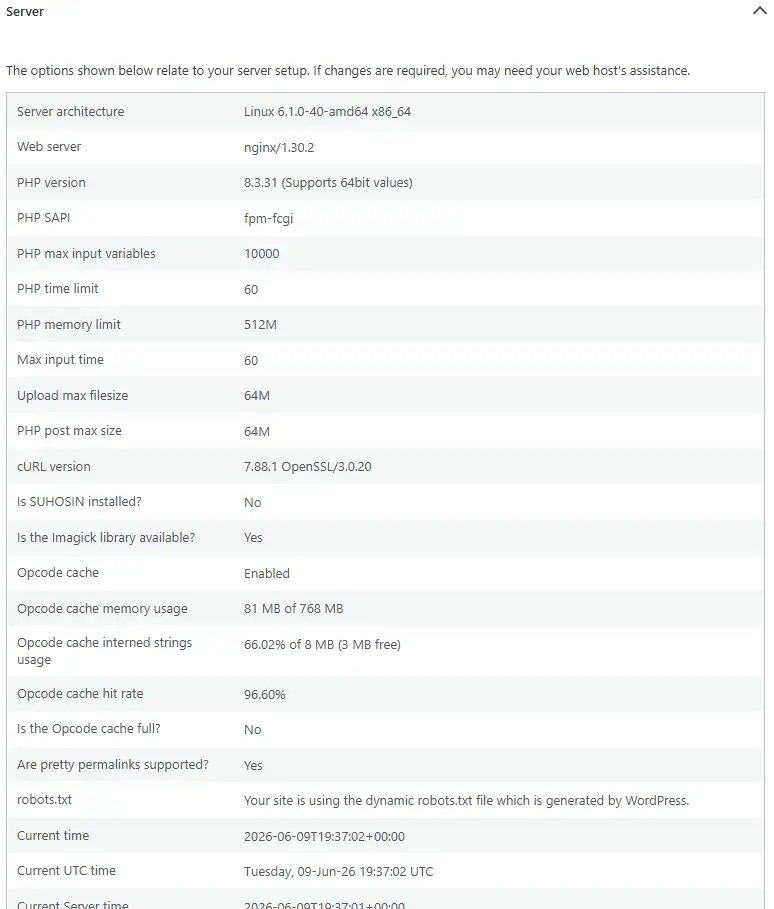
You can track your exact system load spikes directly inside the monitoring layout:
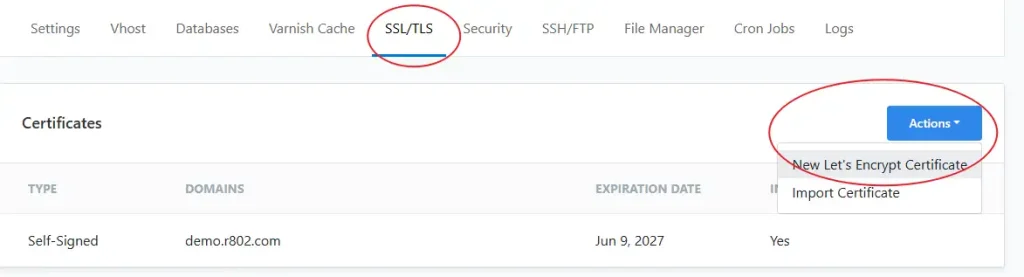
To fix the browser security blocks permanently, go back to the site configuration card inside CloudPanel, click Manage, and hit the SSL/TLS tab. Click Actions and select New Let’s Encrypt Certificate.

The validation module will auto-populate both your root apex domain and the www hostname mapping. Keep in mind that Let’s Encrypt certificates carry a hard 90-day expiration window, but CloudPanel handles the cron renewal verification handshakes automatically in the background.
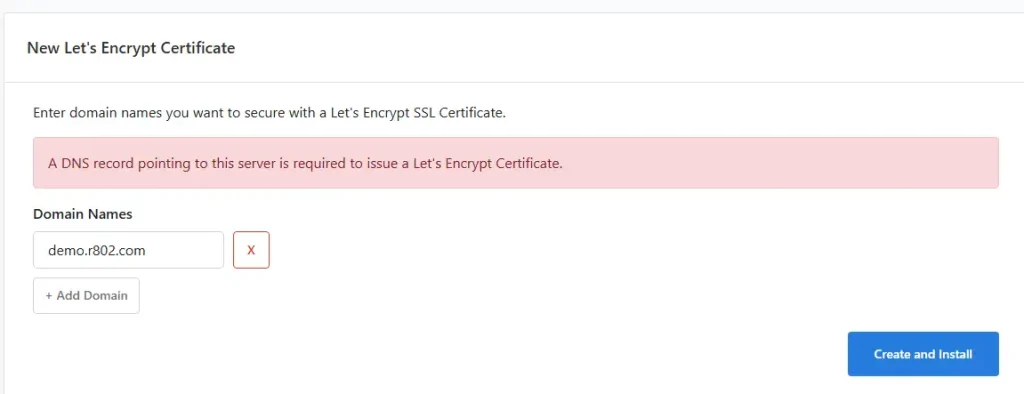
Click Create and Install. Once the Nginx configuration reloads, hit refresh on your browser. Your WordPress deployment is officially locked down over an active HTTPS tunnel. From here, you can dive straight into native plugin configurations and initialize the core WooCommerce installation sequence.