If you drop W3 Total Cache onto a WordPress site hosted via CloudPanel, you’re almost guaranteed to get hit with a couple of annoying admin notices right out of the gate.
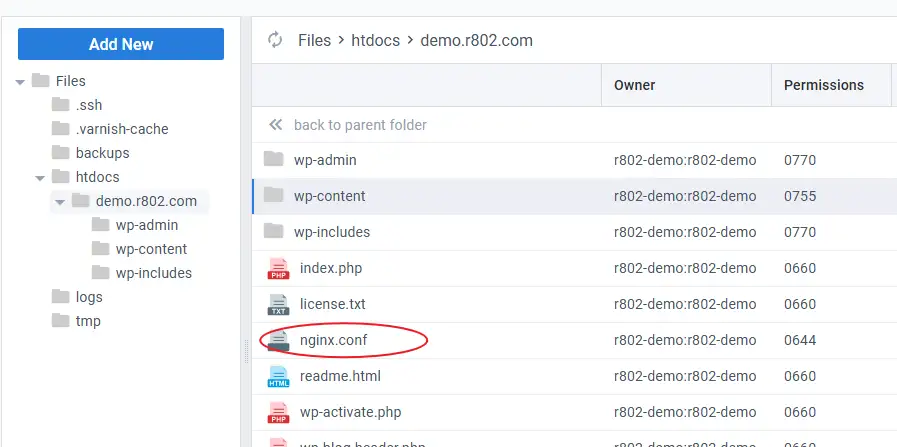
/home/r802-demo/htdocs/demo.r802.com/wp-content is write-able. When finished installing the plugin, change the permissions back to the default: chmod 755 /home/r802-demo/htdocs/demo.r802.com/wp-content. Permissions are currently 770.nginx.conf rules have been updated. Please restart nginx server to provide a consistent user experience.
Here is exactly why this happens on CloudPanel and how to actually fix it without breaking your site.
Fixing the 770 Permission Warning
W3 Total Cache needs to dump a bunch of config files (like advanced-cache.php) and build out its own cache directory inside /wp-content/ during setup. CloudPanel defaults your site directories to 770 so the site user and group can actually do their jobs.
Once W3TC finishes writing its files, its internal security check freaks out because 770 is “too permissive” for its liking, and it demands you scale it back to 755.
Option A: The Fast Way (SSH)
Pop open your terminal, SSH into your server, and run this:
chmod 755 /home/r802-demo/htdocs/demo.r802.com/wp-contentRefresh the WordPress dashboard, and the error should vanish.
Option B: The GUI Route
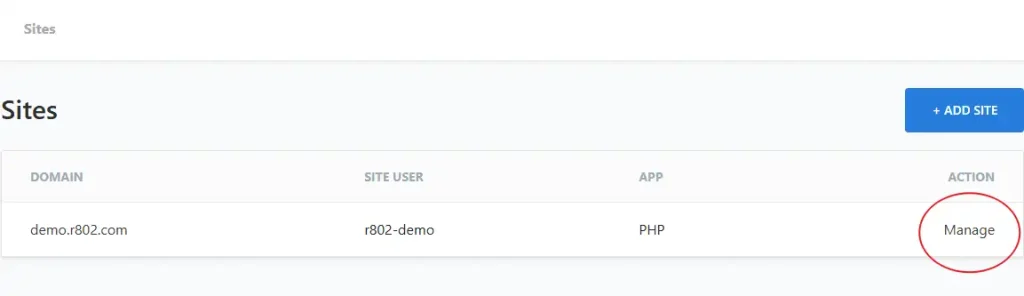
If you don’t feel like opening a terminal, do it directly inside CloudPanel:
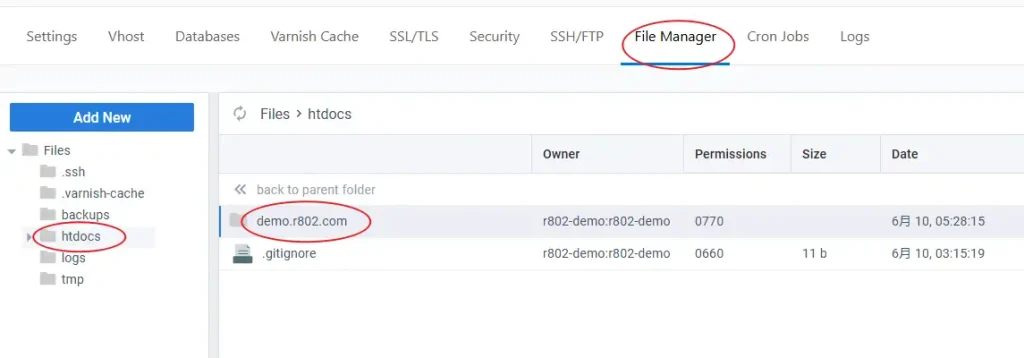
Go to Sites and click Manage on your domain.
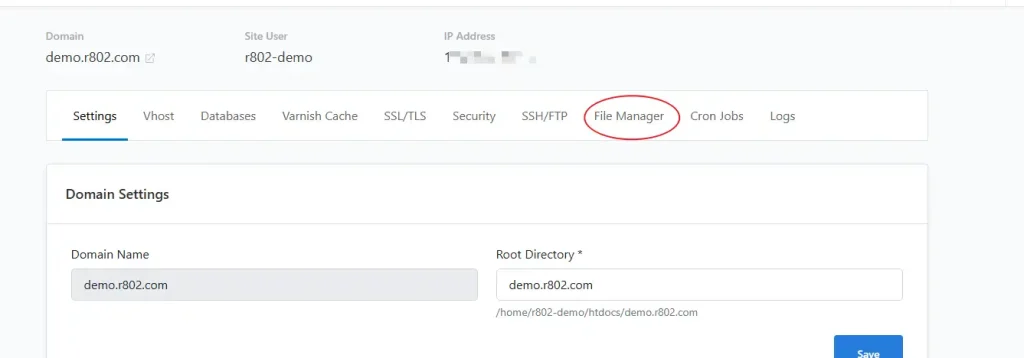
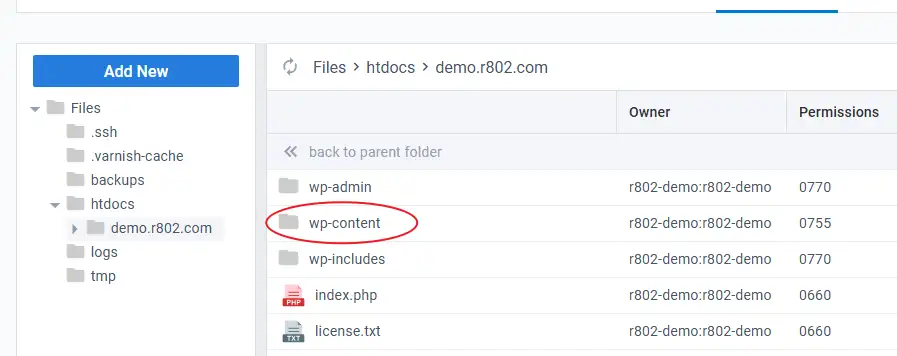
Hit the File Manager and navigate into htdocs -> yourdomain.com.
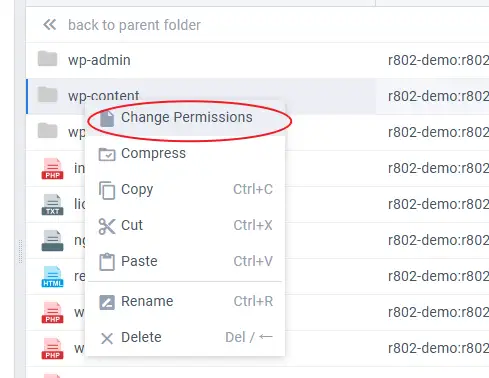
Right-click the wp-content folder, select Change Permissions, swap it to 755, and save.

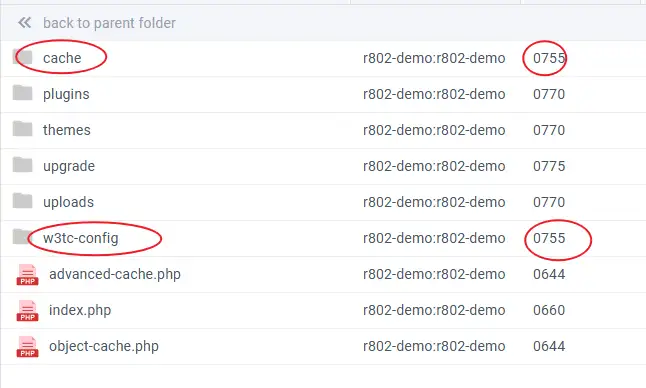
If the warning stubbornly clings on after refreshing, dive inside wp-content and force-change the cache and w3tc-config folders to 755 using the exact same method. That kills the warning for good.
The Nginx Config Trap: Why Restarts and Vhost Edits Fail
The second warning—nginx.conf rules have been updated—is a massive headache on CloudPanel.
Normally, W3TC tries to write custom rewrite and caching rules directly to an nginx.conf file in your root directory to handle page and browser caching. It then begs you to restart Nginx so they take effect.
But if you are on CloudPanel, restarting Nginx or the entire server does absolutely nothing.
If you ask a generic AI assistant, it will confidently tell you to just copy those W3TC rewrite rules and paste them into the Vhost tab inside CloudPanel. Don’t bother. That is completely wrong for this specific stack.
CloudPanel’s architecture is structured differently. It listens on ports 80, 443, and 8080 simultaneously.
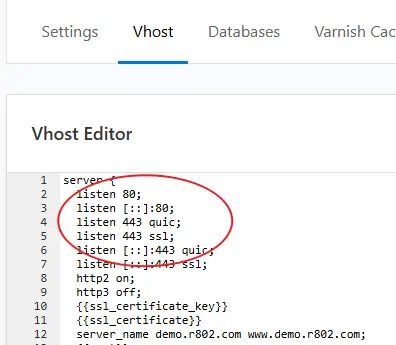
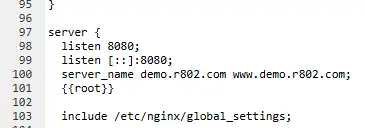
Because of this setup, dragging and dropping W3TC’s generated rules into the 80/443 server blocks or the 8080 block will fail silently. Even trying to inject it cleanly via an include statement won’t work:
include /home/r802-demo/htdocs/demo.r802.com/nginx.conf;While that include trick works perfectly on a vanilla Nginx stack, CloudPanel ignores it.
The Real Fix: Swap to Memcached/Redis
Since CloudPanel completely breaks standard disk-based Nginx rewrites, you have to bypass disk caching entirely. Luckily, CloudPanel ships with native, pre-configured support for Memcached and Redis.
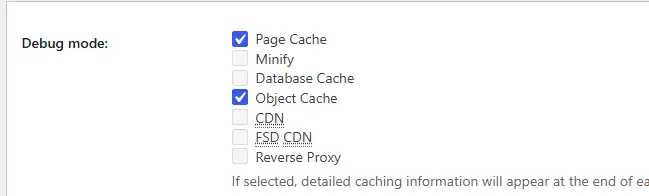
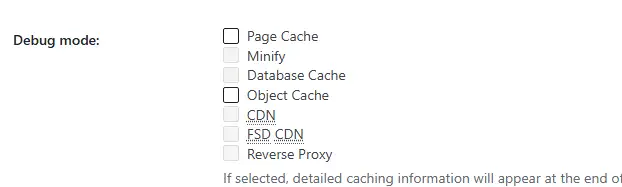
To see the underlying failure yourself, turn on Debug Mode in the W3TC settings. You’ll instantly see this error splashed across your dashboard:
<strong>W3 Total Cache error:</strong> It appears Page Cache <acronym title="Uniform Resource Locator">URL</acronym> rewriting is not working. Please verify that all configuration files are included in the configuration file (and that you have reloaded / restarted nginx).<br />Unfortunately disk enhanced page caching will not function without custom rewrite rules. Please ask your server administrator for assistance. Also refer to <a href="https://demo.r802.com/wp-admin/admin.php?page=w3tc_install">the install page</a> for the rules for your server.
To stop this loop, go to the W3TC General Settings and change Page Cache to Memcached (or Redis). Do not touch Disk or Disk: Enhanced.
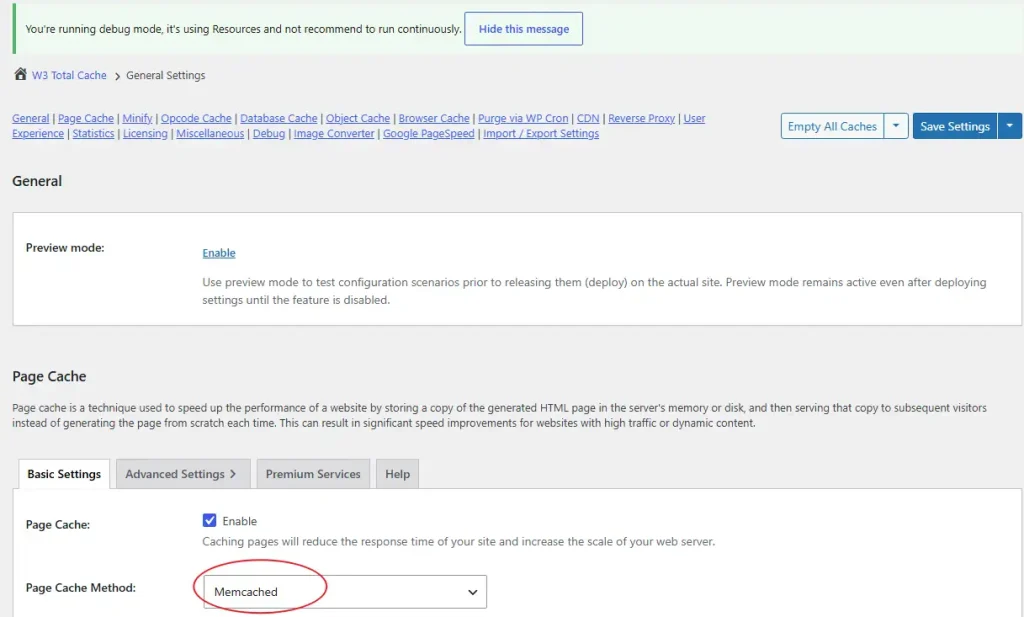
Next, completely disable Browser Cache inside W3TC. CloudPanel handles headers efficiently anyway, so you don’t need the plugin fighting the server over it.

Once those two changes are saved, click Hide this message on the annoying Nginx notice. It won’t come back. Even if a future configuration change triggers the notice again, as long as your Debug Mode isn’t throwing actual URL rewriting errors, you can safely ignore it and click hide.
If you see a warning saying The setting change(s) made either invalidate the cached data..., just click Empty All Caches and move on.
Verifying the Cache
To make sure your caching isn’t placebo, open an Incognito window, load any page on your site, and refresh it a few times. Right-click, view the page source, and scroll to the absolute bottom.
If you kept Debug Mode temporarily enabled, you will see the W3TC comment block clearly stating that the page was served via Memcached.

Once you confirm everything is hitting the memory cache properly, go back into W3TC and uncheck all Debug options to keep your production HTML clean and save processing overhead.
A Quick Warning for WooCommerce Stores
CloudPanel includes a toggle for Varnish Cache right in the site dashboard. While CloudPanel’s default Vhost template tries to exclude WooCommerce cookies, it is still highly risky and notorious for breaking checkout flows or cart states. To sleep soundly at night, bypass Varnish entirely for WooCommerce and stick to W3TC’s Memcached or Redis implementation for your object and page caching.