Running a WooCommerce store on CloudPanel is a solid choice for performance, but out-of-the-box WordPress will still choke under concurrent traffic if you don’t configure caching correctly. CloudPanel comes with Memcached and Redis pre-installed and running at the OS level. You just need to hook WordPress into them.
Instead of bloated premium plugins, W3 Total Cache (the free version) gets the job done perfectly when paired with CloudPanel’s stack. Here is how to configure it without breaking your checkout flow.
The Fast Track: Standard Setup Guide
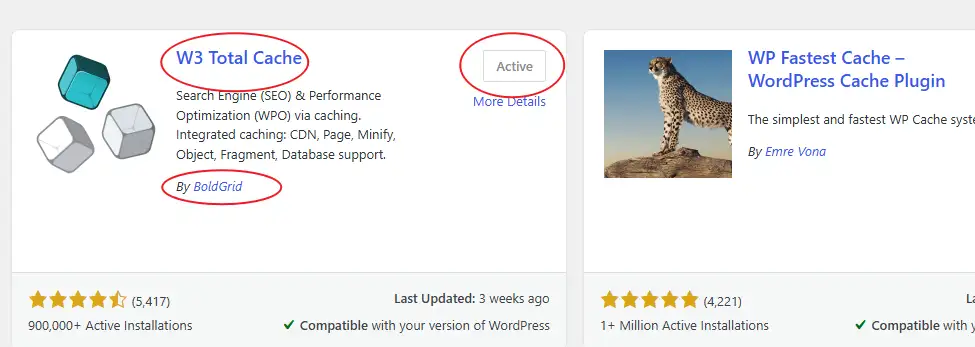
First, head over to yourdomain.com/wp-admin/plugin-install.php, search for W3 Total Cache, install it, and activate it.
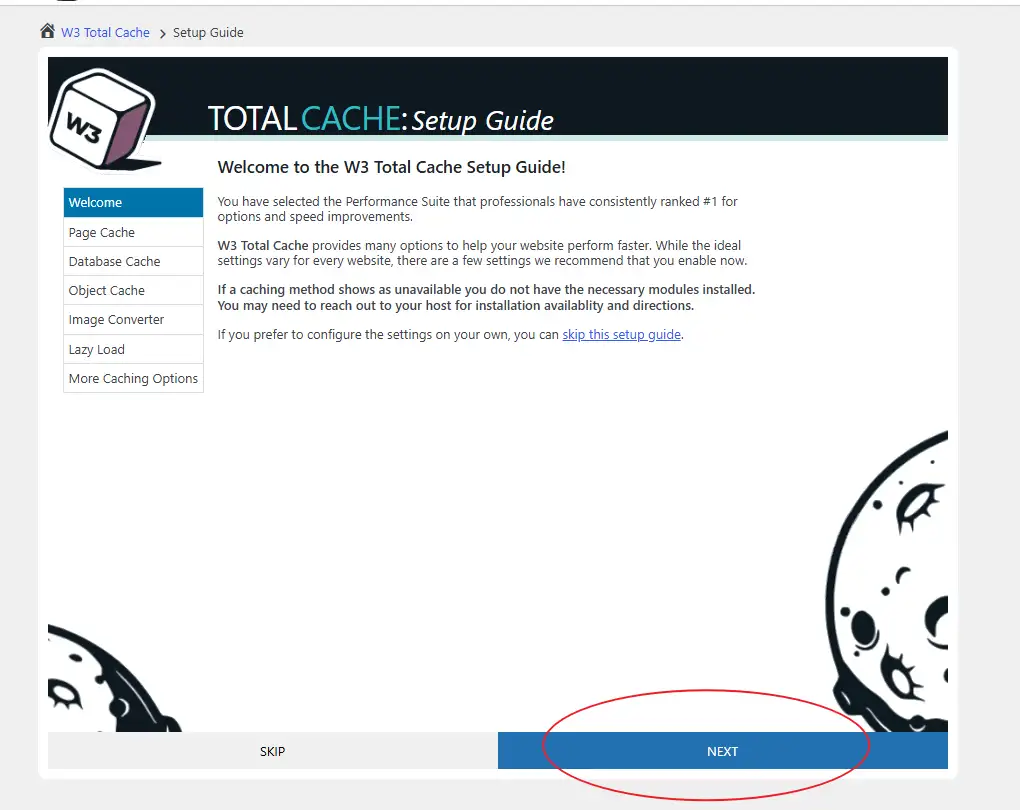
Once active, the plugin kicks you into a Setup Guide. Hit Next to start the wizard.
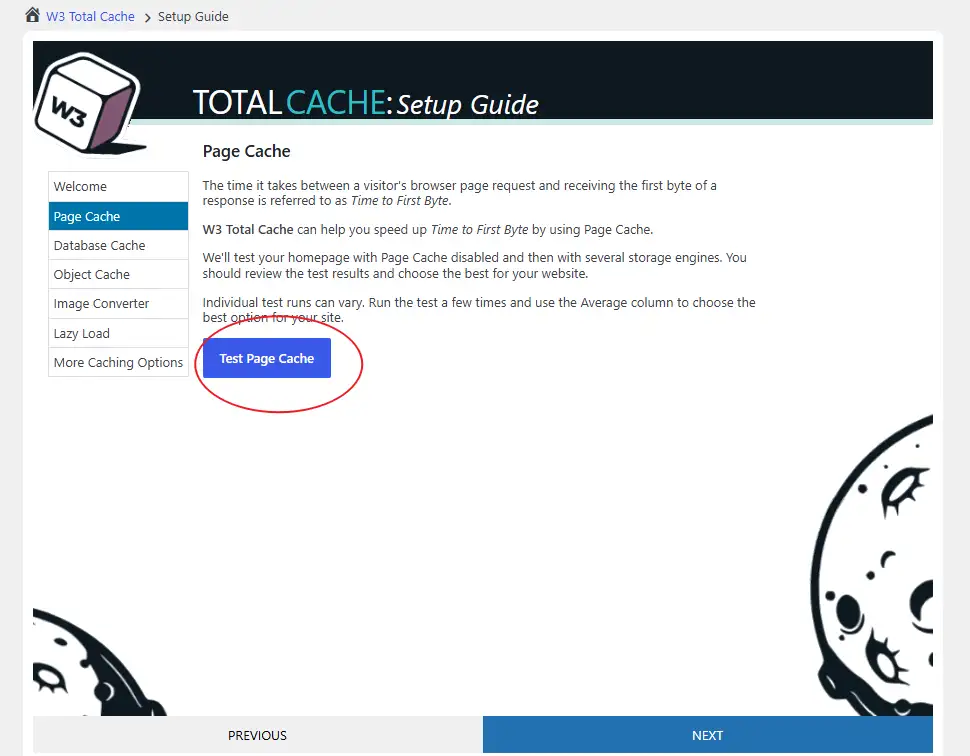
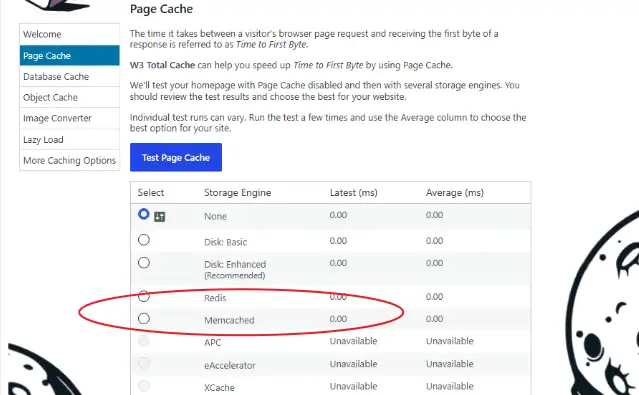
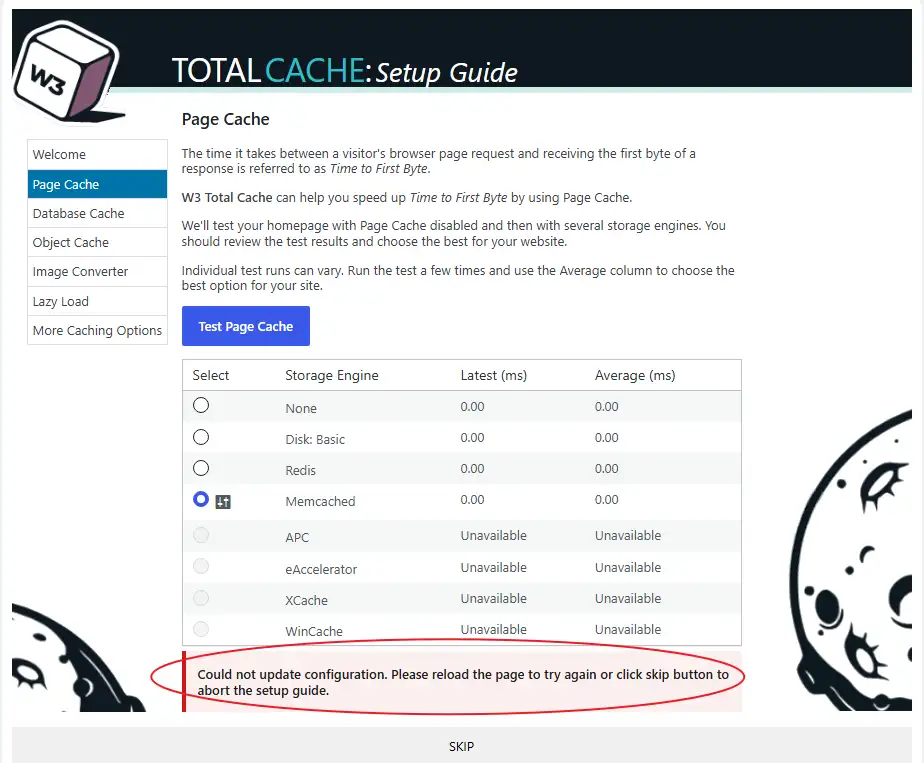
Page Cache
Hit Test Page Cache. When the benchmarks finish, select either Memcached or Redis.
If you were on a generic VPS or a raw Nginx/PHP-FPM setup, Disk Enhanced would be the default move here. But since CloudPanel handles the memory daemons natively, utilize the RAM.
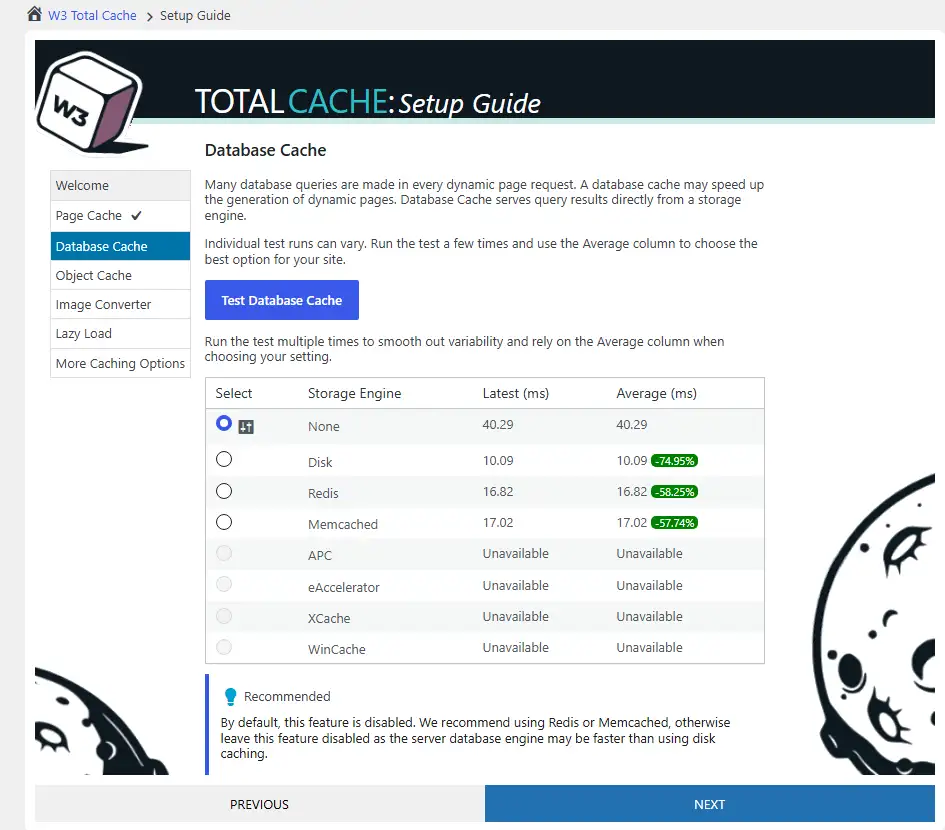
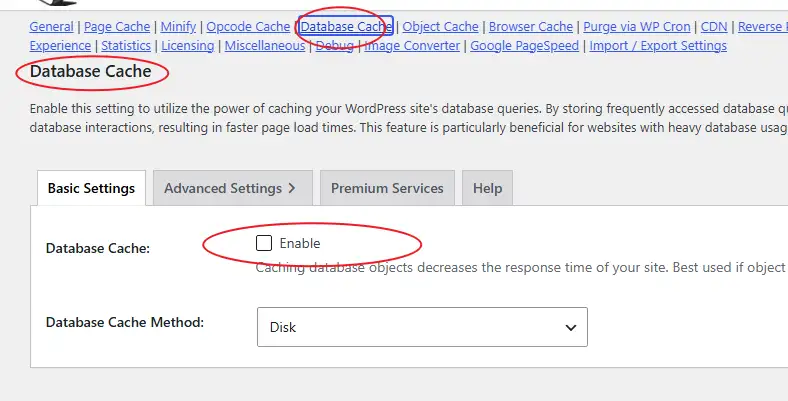
Database Cache
Set this to None. Seriously, do not enable Database Cache. Whether you are running CloudPanel, a custom Docker stack, or bare metal, database caching via W3TC often adds overhead and creates weird stale-data bugs. MySQL/MariaDB already handles its own indexing and query caching efficiently.
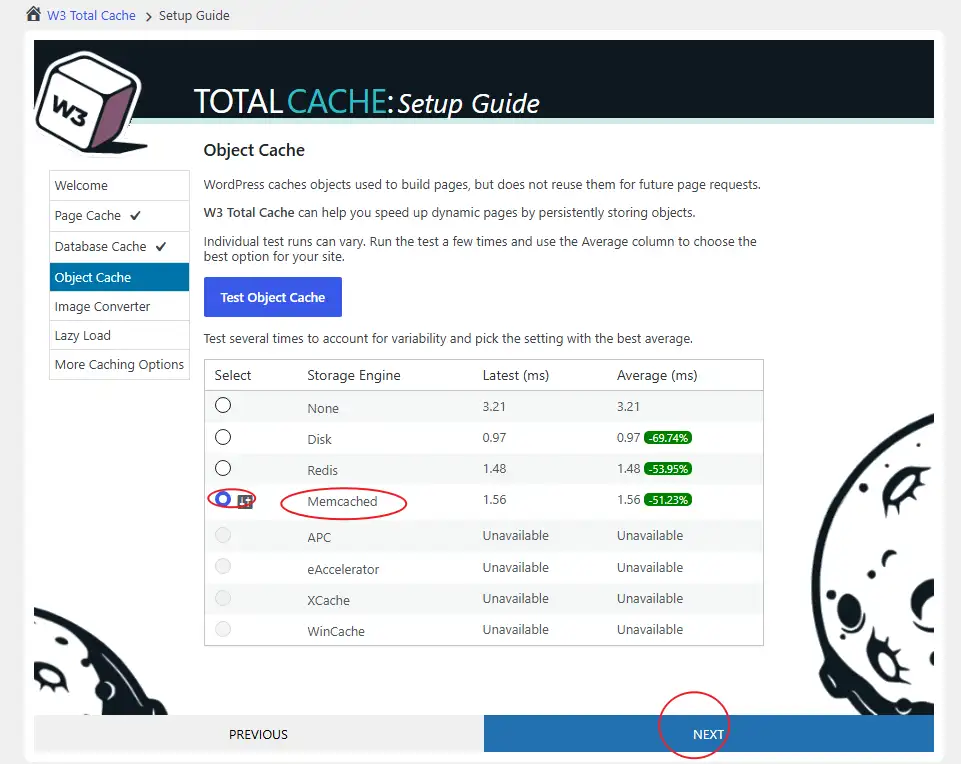
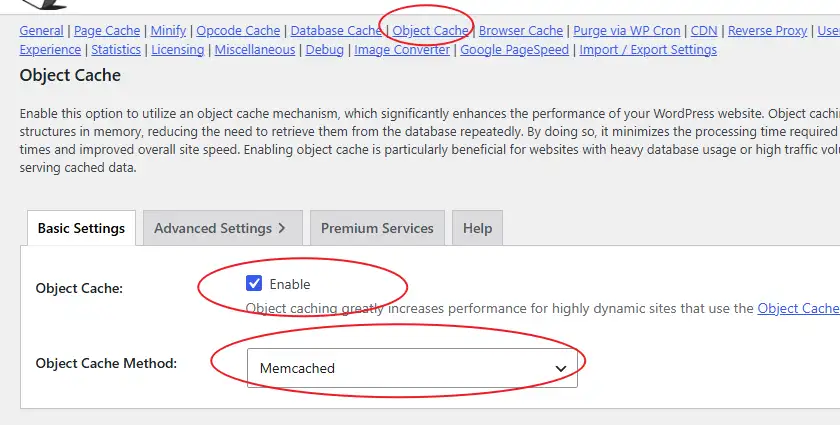
Object Cache
Select Memcached or Redis. A good rule of thumb for resource allocation: if your instance has 2GB of RAM, stick with Memcached. If you are on a 4GB or higher plan, go with Redis.
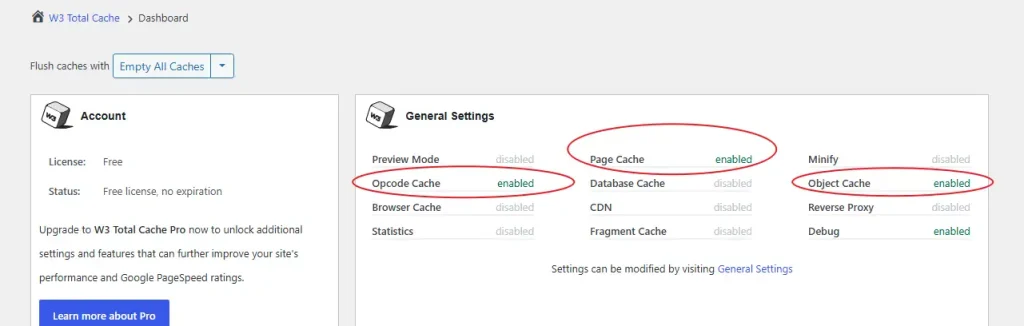
Your final status screen should show green across the board for Page Cache and Object Cache using your chosen memory backend.
The Manual Route (If the Wizard Crashes)
W3TC wizards can throw errors. If you see an error stating Could not update configuration. Please reload the page to try again or click skip button to abort the setup guide, just click Skip.
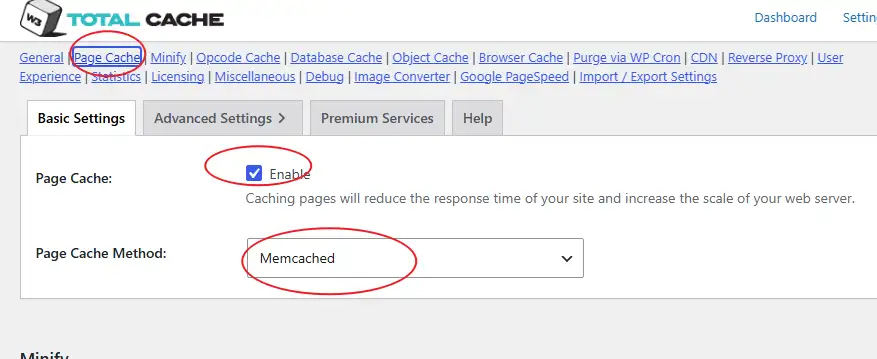
Go directly to yourdomain.com/wp-admin/admin.php?page=w3tc_general to configure the options manually.
- Page Cache: Enable it and select Memcached or Redis.
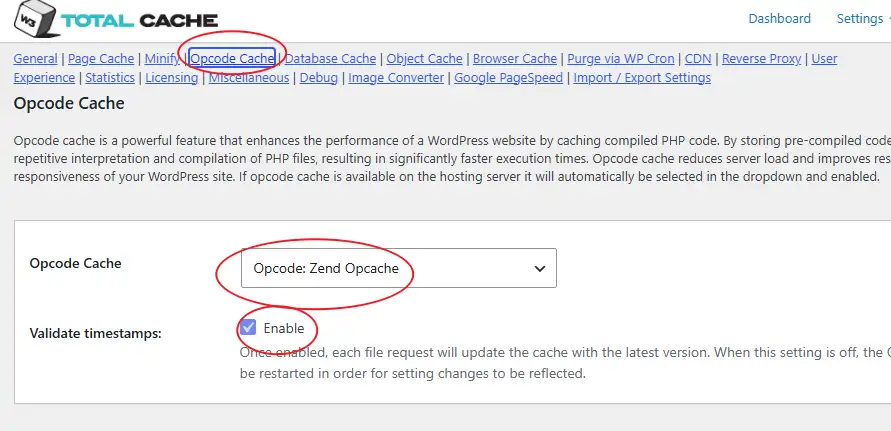
- Opcode Cache: Enable it and select Opcode: Zend Opcache. CloudPanel keeps this active by default in PHP, so make sure W3TC tracks it.
- Database Cache: Keep it disabled.
- Object Cache: Enable it and pick your backend (Memcached or Redis).
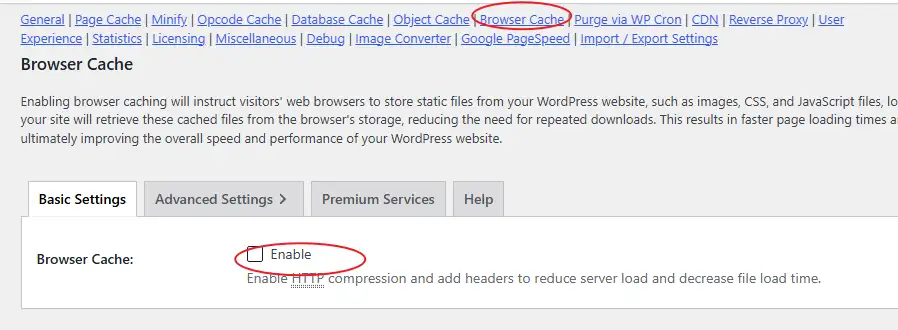
- Browser Cache: Disable it. This sounds counterintuitive, but CloudPanel’s Nginx configuration already injects optimized cache-control headers for static assets at the web server level. Enabling it in W3TC creates redundant configurations that can mess up your headers. (If you weren’t on CloudPanel, you would need this on, but here, keep it off).
If you want to verify everything works under the hood, toggle the Debug mode options temporarily before saving.

Hit Save Settings at the top right to write the config.

Verifying the Cache and Server Environment
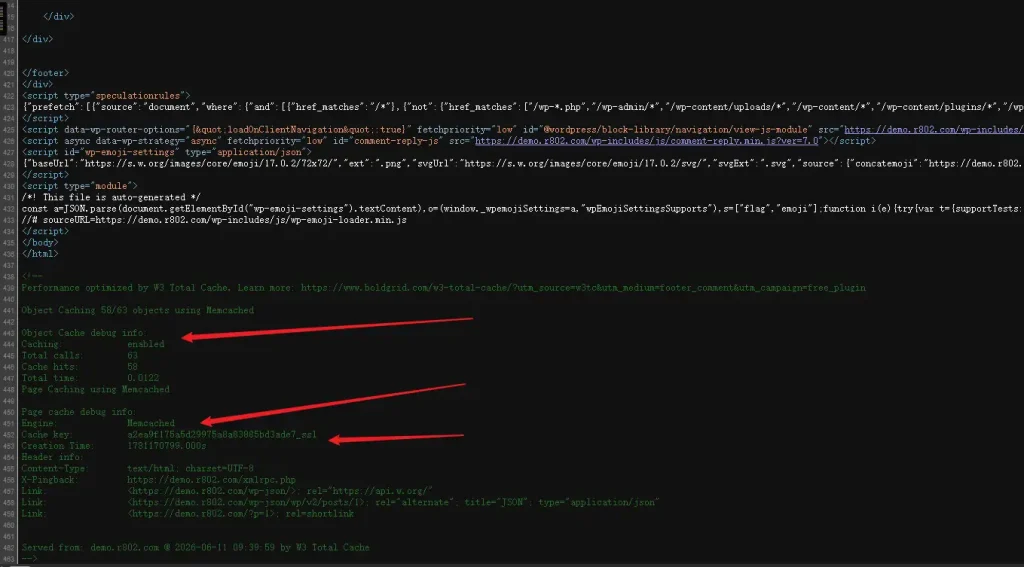
Open an Incognito window, load your site, and refresh it a few times to prime the cache. Right-click, view the page source, and scroll to the absolute bottom. If debug mode is active, you will see a detailed breakdown proving the memory injection is working:
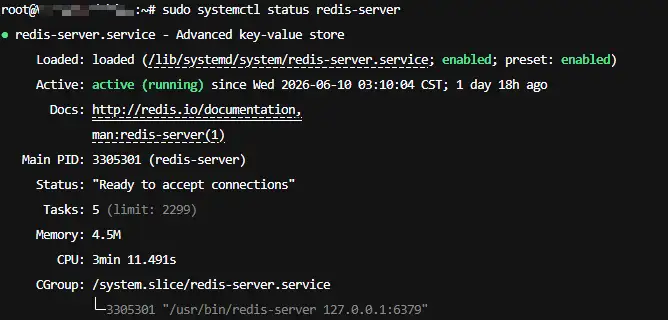
If you want to double-check the OS level, SSH into your server. Run these commands to verify that the daemons are active and that the PHP extensions are loaded:
sudo systemctl status memcached.service
sudo systemctl status redis-server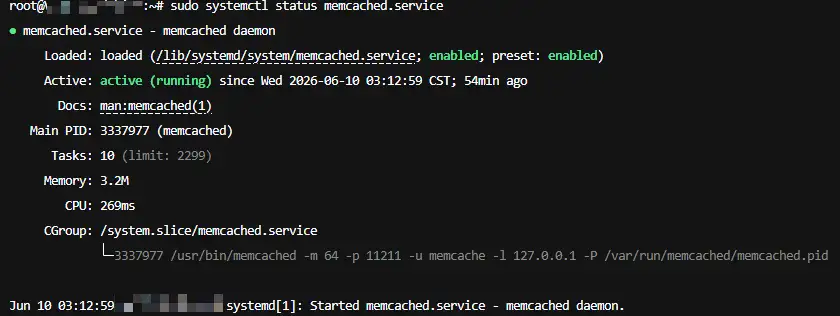
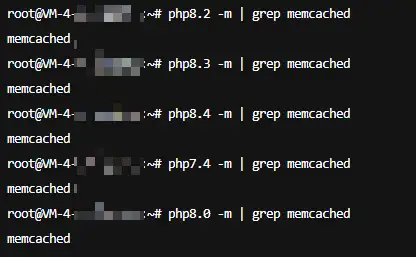
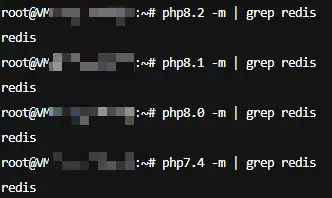
CloudPanel automatically compiles the necessary PHP modules, so you do not need to install extra extensions manually.
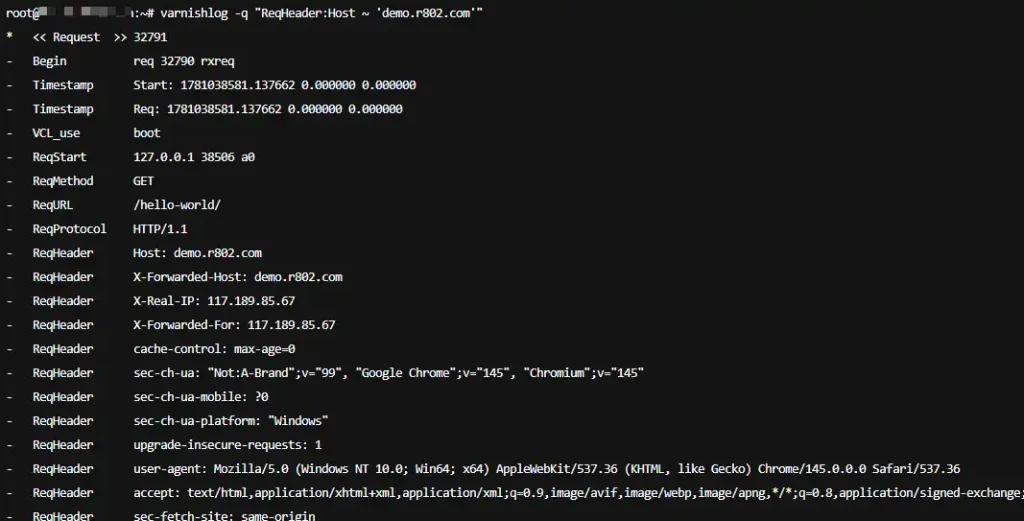
You can also monitor live reverse-proxy caching behavior via Varnish if your specific stack uses it:
varnishstat
varnishlog -q "ReqHeader:Host ~ 'demo.r802.com'"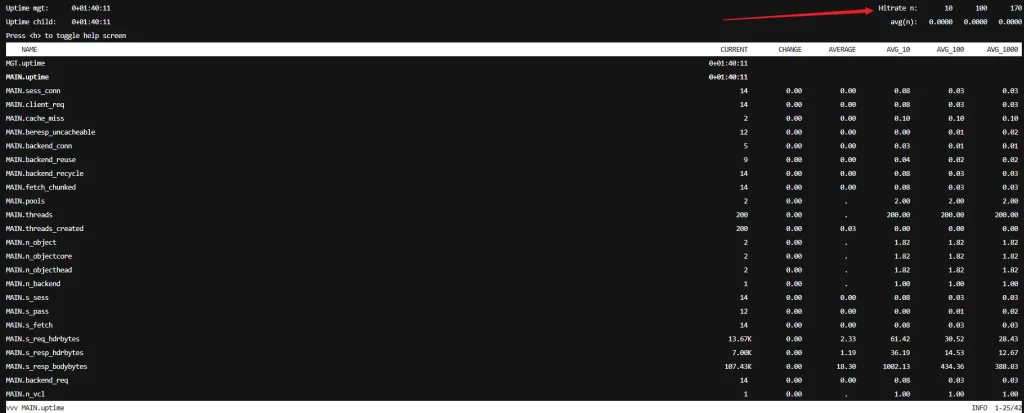
Critical WooCommerce Rules: Multi-Site Salting & Page Exclusions
Caching a dynamic e-commerce store requires precise rules, otherwise your customers will end up seeing other people’s shopping carts or getting locked out during checkout.
1. Dynamic Page Exclusions
You must explicitly exclude dynamic pages like /cart/, /checkout/, and /my-account/ from page caching. Refer to standard WooCommerce cache exclusion documentation to map these paths out in your W3TC advanced settings, otherwise transactions will break.
[!NOTE]
If you toggled Varnish on in CloudPanel, excluding paths in W3TC is not enough. You must ensure CloudPanel’s Vhost Nginx/Varnish rules are skipping the cache for these cookies and paths entirely. If you want to play it safe, stick strictly to Memcached/Redis for page caching and keep Varnish off for WooCommerce.
2. Isolation for Multi-Site/Multi-Store Environments
If you are running multiple independent WooCommerce instances on a single server, you have a security and data collision risk. By default, Redis uses db 0 and Memcached uses a shared namespace. If you don’t isolate them, Store A will serve cached data, sessions, and transients to Store B.
Open the wp-config.php file for each specific site and inject unique identifiers.
If you are using Redis:
Assign each site its own dedicated database index number and a unique key salt string.
For Store 1:
define( 'WP_REDIS_DATABASE', 1 );
define( 'WP_CACHE_KEY_SALT', 'shop_1' );
For Store 2:
define( 'WP_REDIS_DATABASE', 2 );
define( 'WP_CACHE_KEY_SALT', 'shop_2' );
If you are using Memcached:
Memcached doesn’t use multiple database indices like Redis, so you must rely entirely on distinct salts to partition the data cache.
For Store 1:
define( 'WP_CACHE_KEY_SALT', 'shop_live_2026_01' );For Store 2:
define( 'WP_CACHE_KEY_SALT', 'shop_live_2026_02' );If you are only hosting a single store on your server, you can leave these constants out completely, but the moment you add a second site, isolation is mandatory.