First things first: you need the W3 Total Cache plugin installed. Also, if you are running a CloudPanel environment, turn off Varnish cache completely or this entire setup will break.
Stop Caching Dynamic Pages
Head over to yourdomain.com/wp-admin/admin.php?page=w3tc_pgcache. Scroll all the way to the bottom until you find the Never cache the following pages field. Paste the following regex rules inside and hit save:
cart
checkout
index\.php
my-account
wp-.*\.php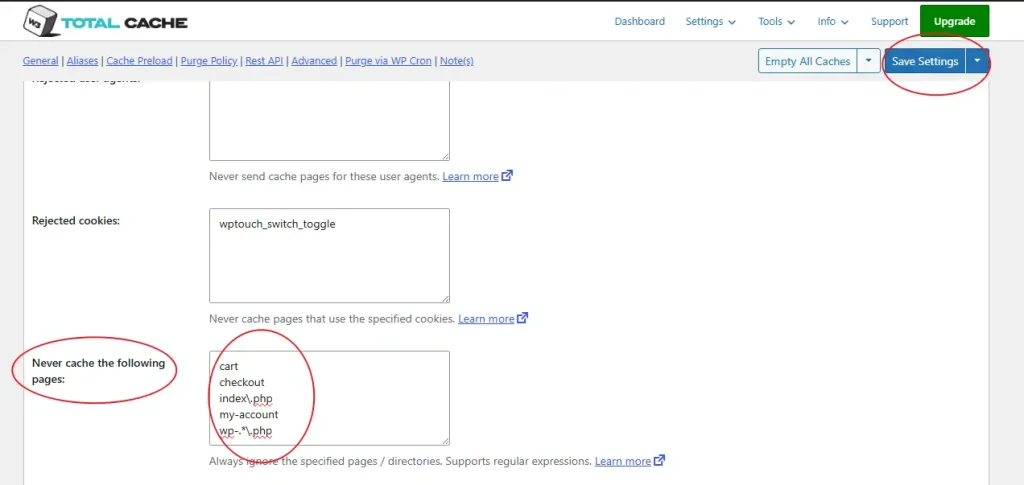
Blacklist WooCommerce Cookies
Stay on the page cache settings and locate the Rejected Cookies section. Add these WooCommerce cookies to the list to keep user sessions from getting tangled up:
wptouch_switch_toggle
woocommerce_cart_hash
woocommerce_items_in_cart
wp_woocommerce_session_
woocommerce_recently_viewed
store_notice[notice id]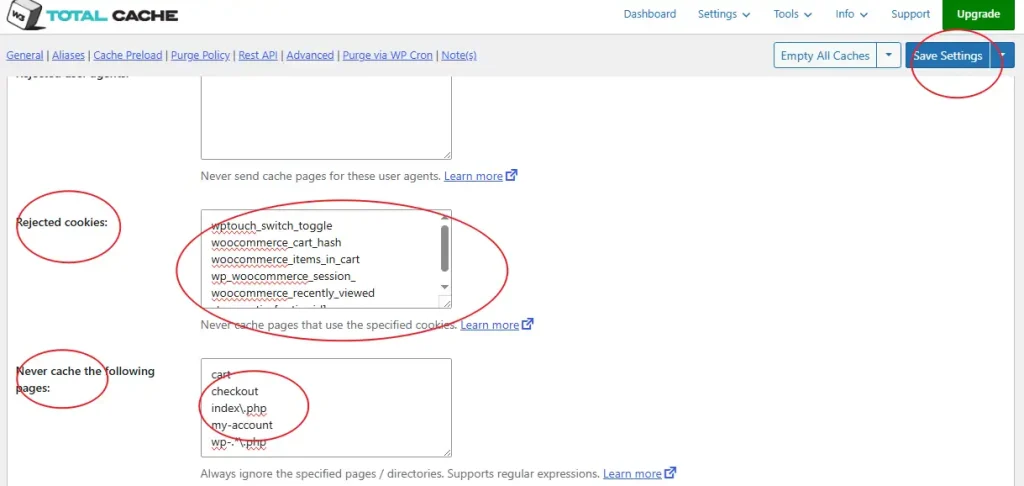
Skip Database Caching
Just leave database caching turned off. It rarely helps with WooCommerce performance and usually introduces weird data syncing bugs.
Keep Browser Caching Disabled
If you are on CloudPanel, do not enable browser caching here. CloudPanel handles Nginx configurations directly, and letting the plugin mess with it will cause headers to conflict.
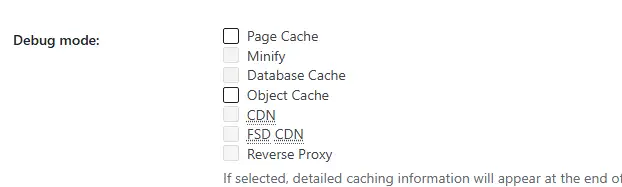
Run a Debug Check on the Cart and Checkout
Turn on the debug mode in W3 Total Cache, then visit your cart and checkout pages as a test user. Check /wp-content/cache/w3tc-debug-*.log to ensure everything runs clean without throwing errors.
If nothing shows up in the logs, your hosting environment might be blocking write permissions to /wp-content/cache/. If that happens, just view the page source in your browser, scroll down to the absolute bottom, and inspect the injected HTML comments for the cache status.
Once you confirm everything works, go back and uncheck all debug options. Leaving debugging active on a production site wastes server resources.